
2026-09-06
Accounting integrations with Stream
Your accountant might have wondered: "if we go with Stream as a billing solution, how can we make sure this does not disrupt our current accounting practices in making sure everything gets registered accurately?"
"Do we have to do all of Stream's invoices manually on the accounting system?"
For all the accountants concerned about this, Stream has got you covered on this one. We have now introduced an easy-to-setup accounting integration with 5 well-known accounting softwares, from within Stream's dashboard, with just a couple of easy steps.
The softwares include:
Odoo
Qoyod
Zoho
Daftra
Wafeq
Odoo:
Step 1:
Sign in to your stream dashboard → settings → accounting integration → Create integration
Step 2:
Once you choose when to post your invoices (whether on creation, or after payment), you will be able to choose your software, and then there are a few fields you have to fill, as image below shows:
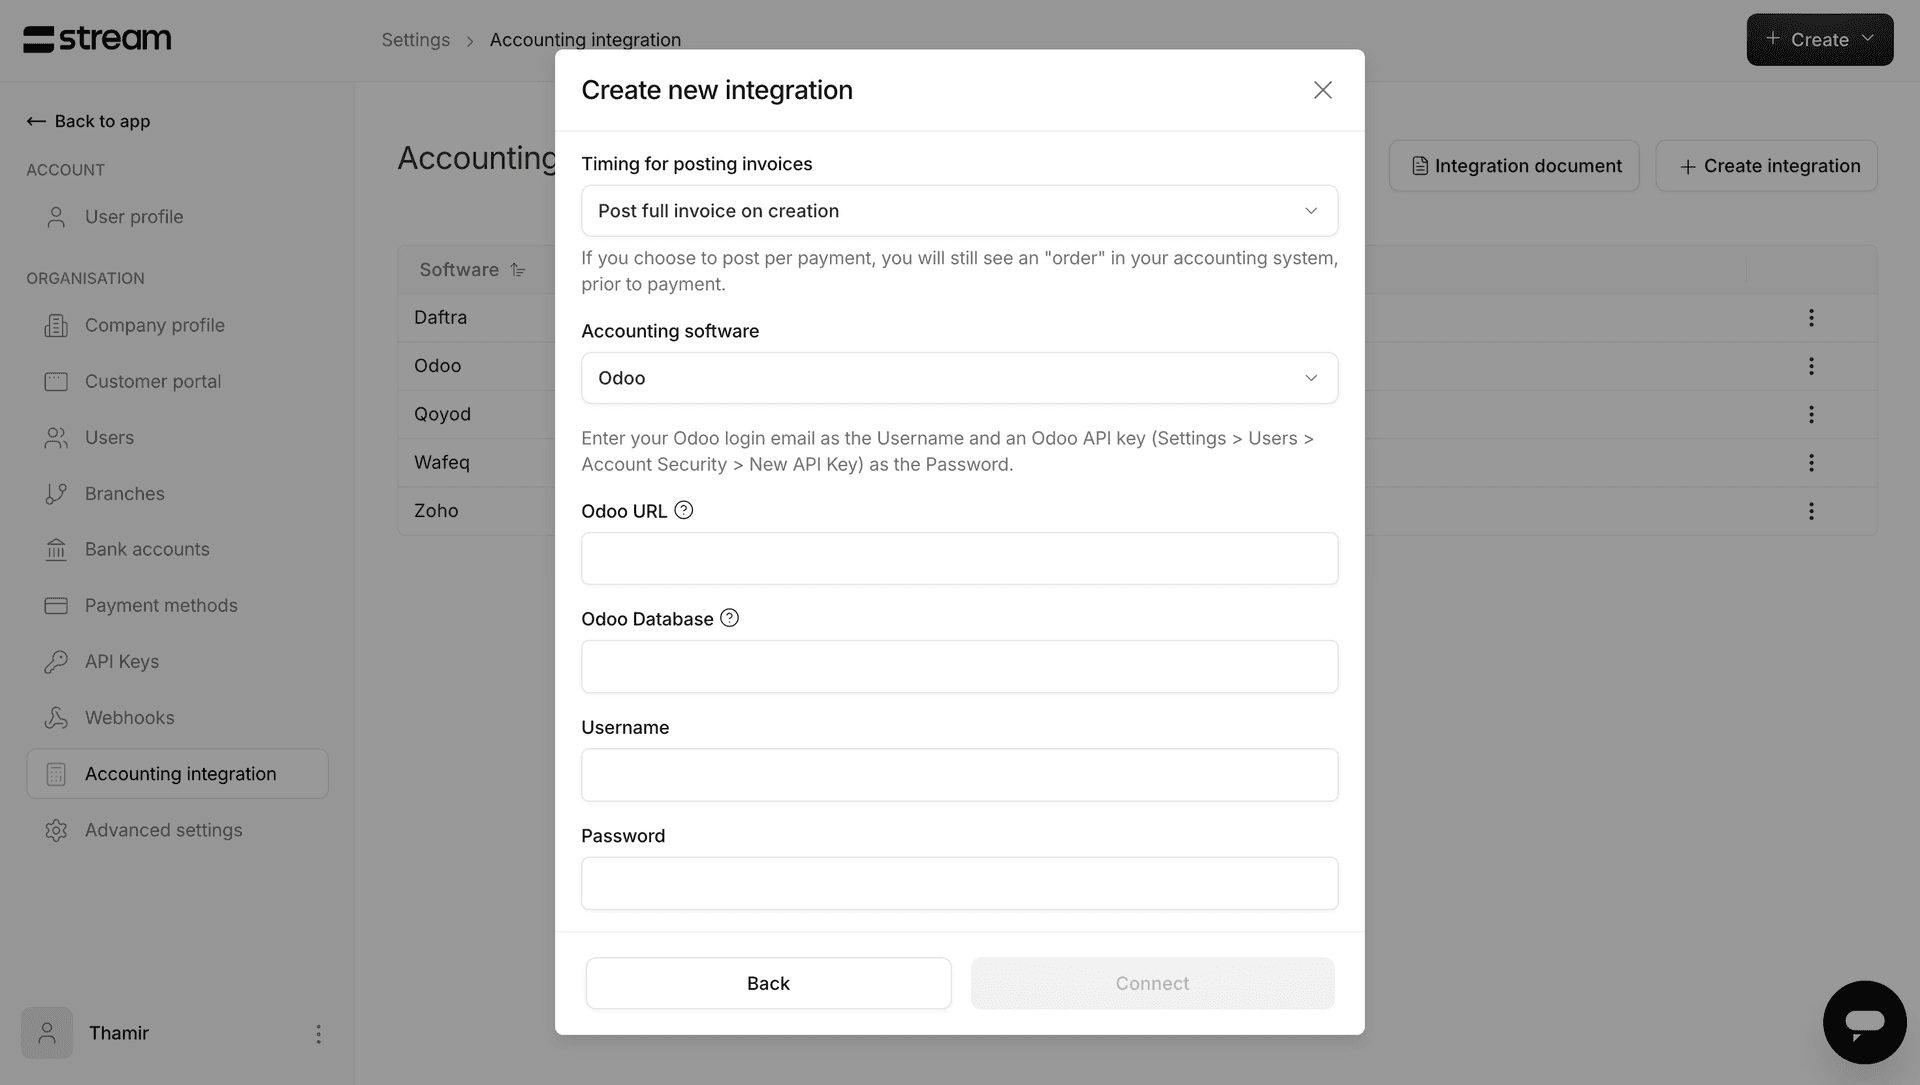
Odoo URL:
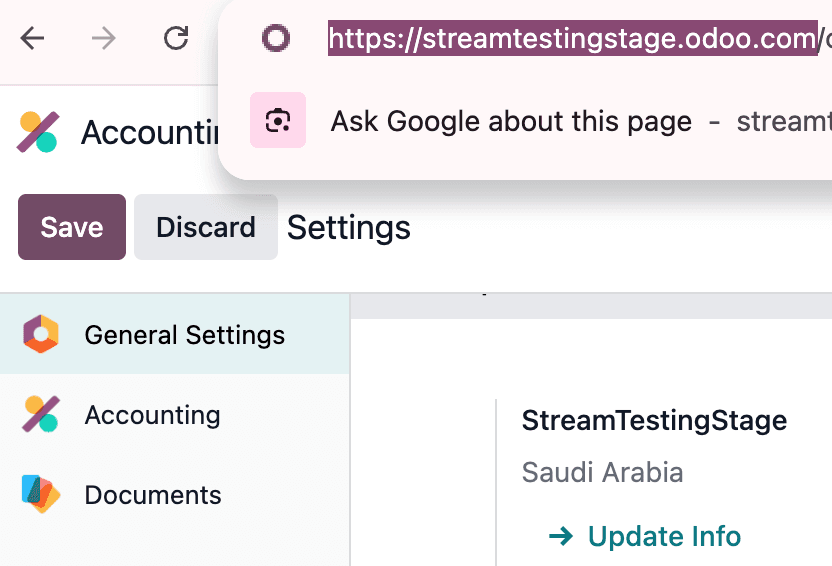
You can find the Odoo url at the top of your Odoo dashboard, in the link entry field, as highlighted below in the image:
Odoo database:
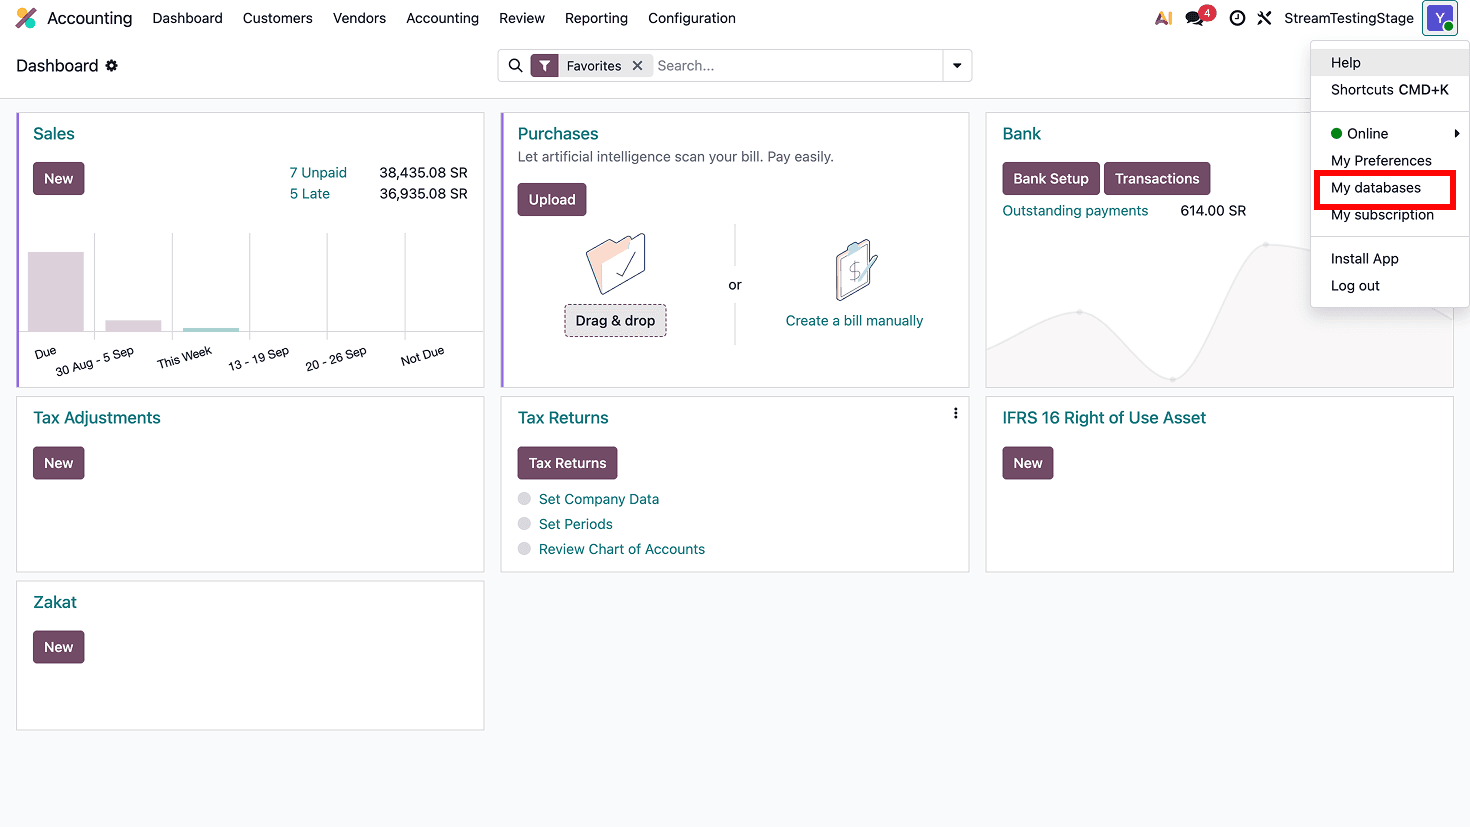
You can go to the username icon on odoo in the top right corner:
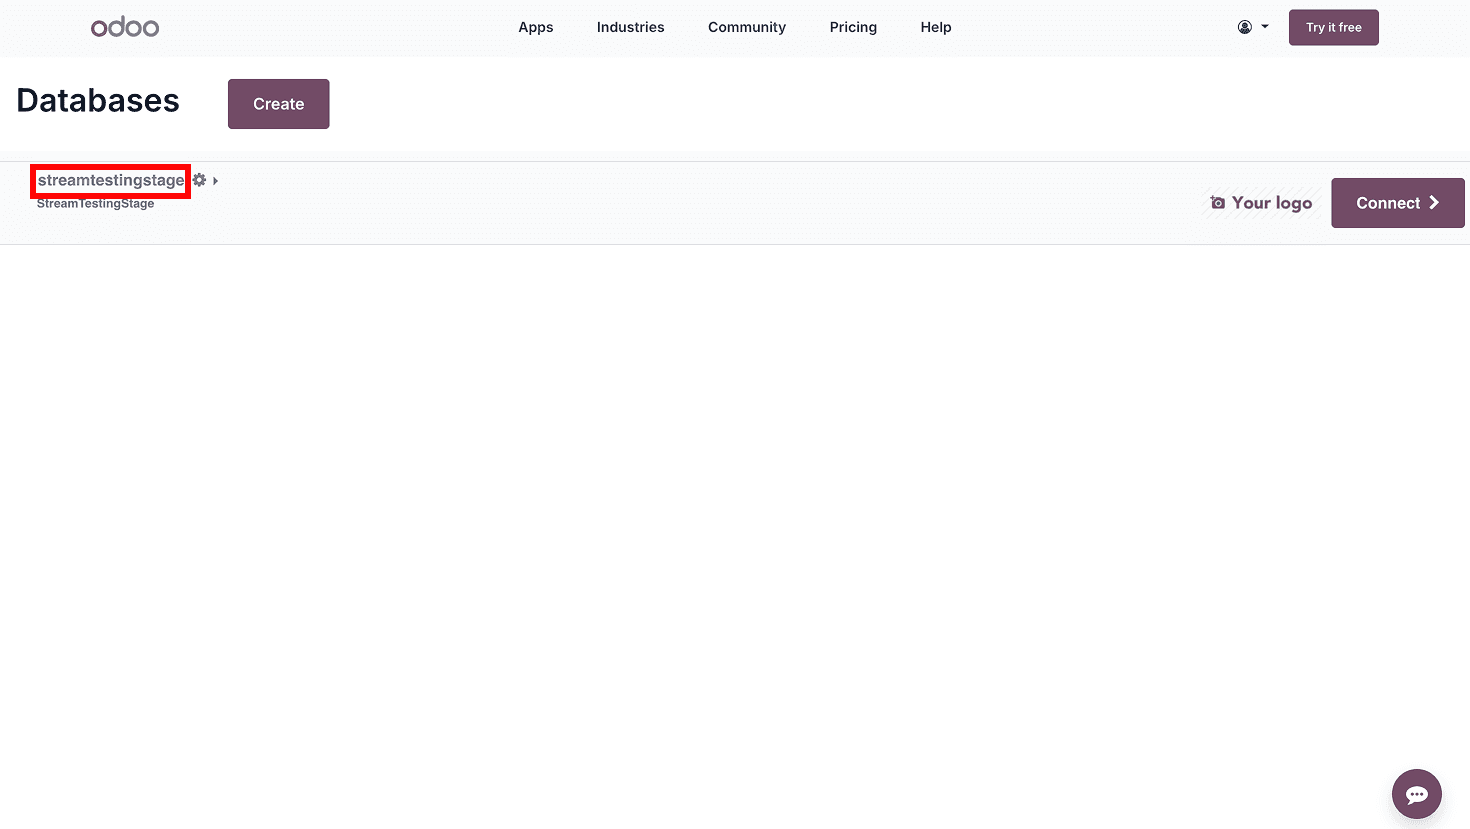
Once you see your database\s, paste the name of the database you would like to post to:
Odoo username:
This should be your user's email on Odoo.
"Odoo password":
This should be the API key you generate on odoo:
The steps to generating an API key is you first go to the settings:
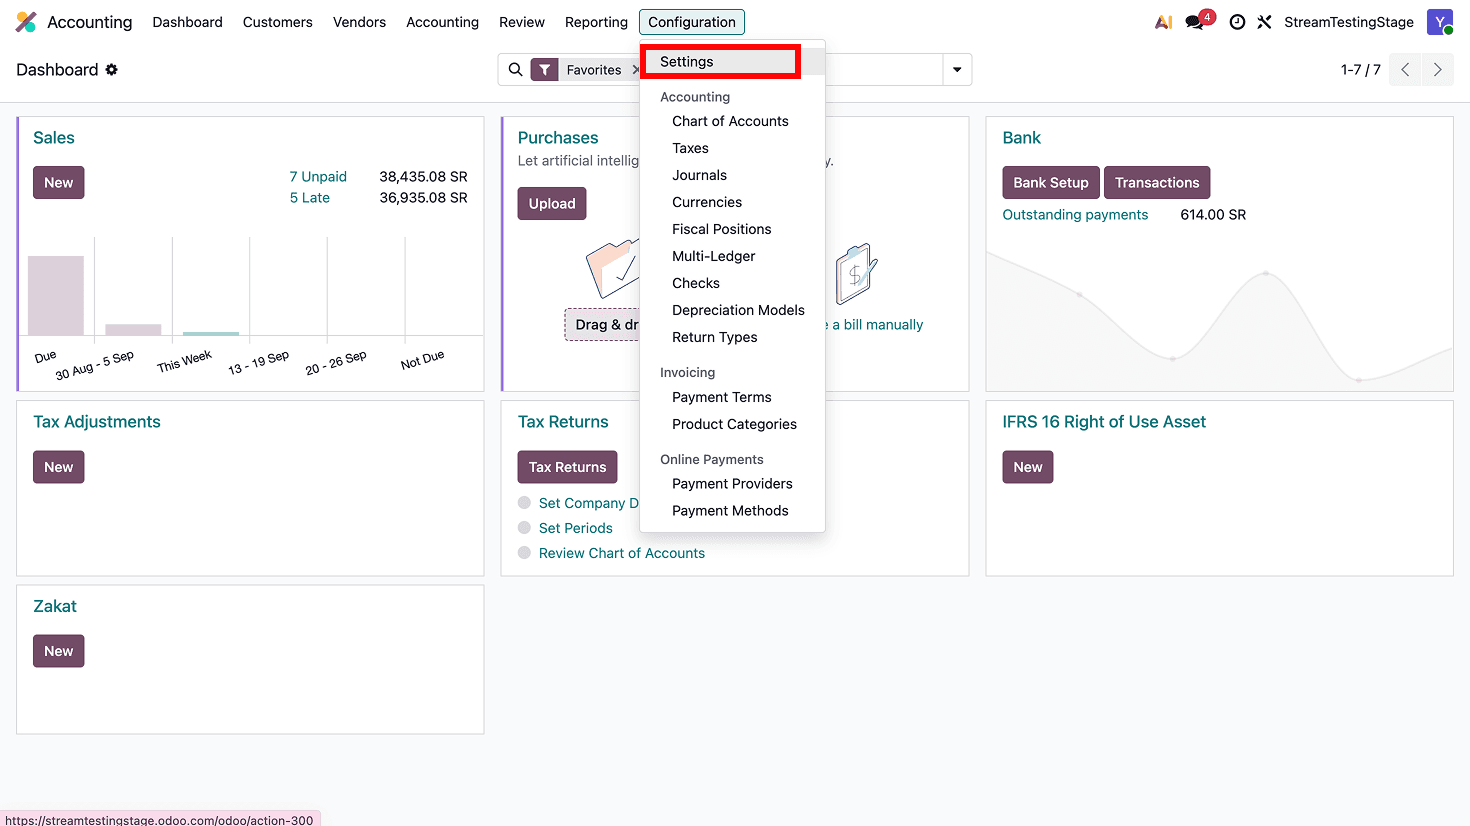
→ general settings → manage users
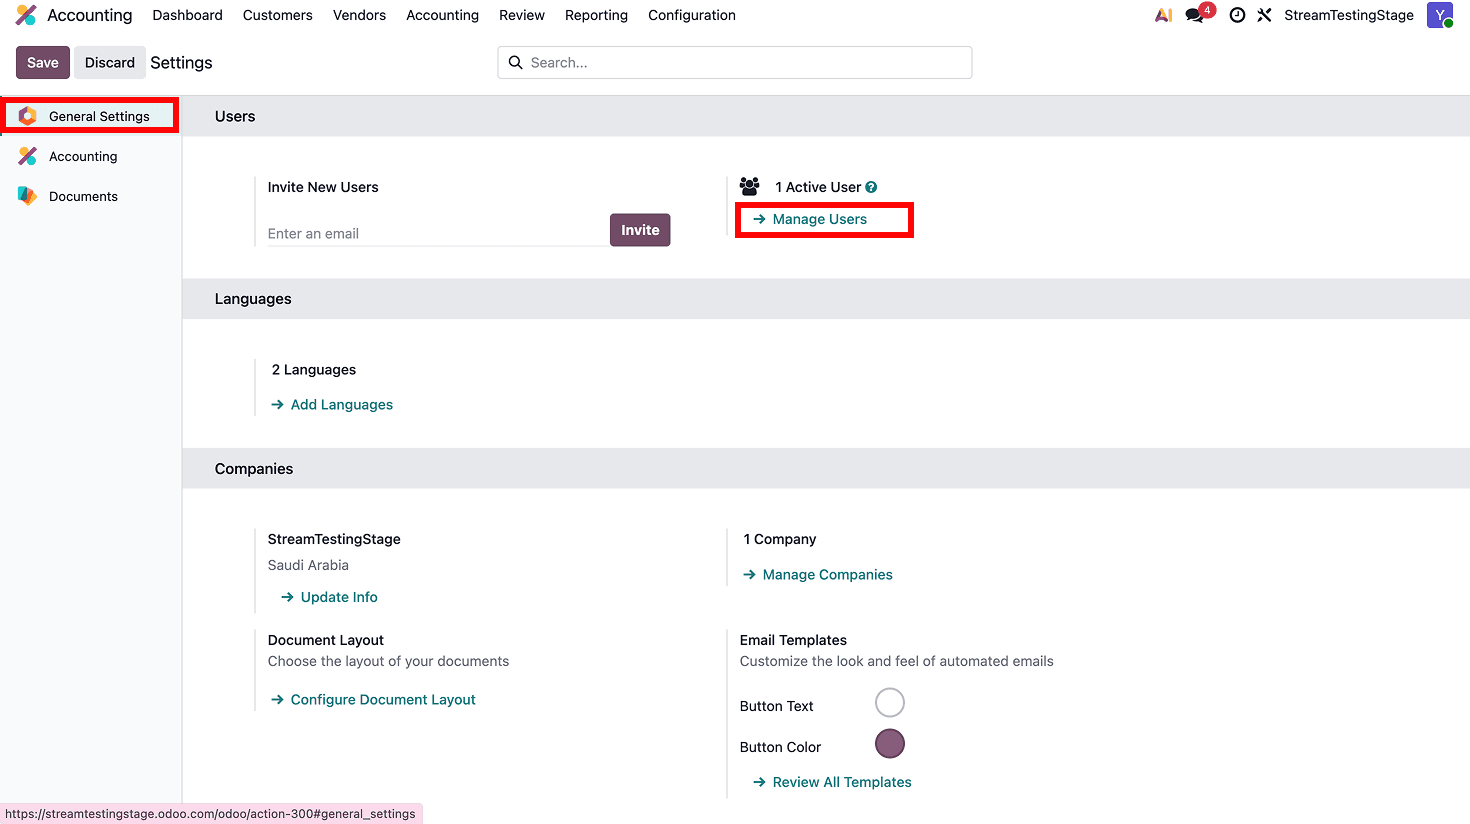
→ click on your user
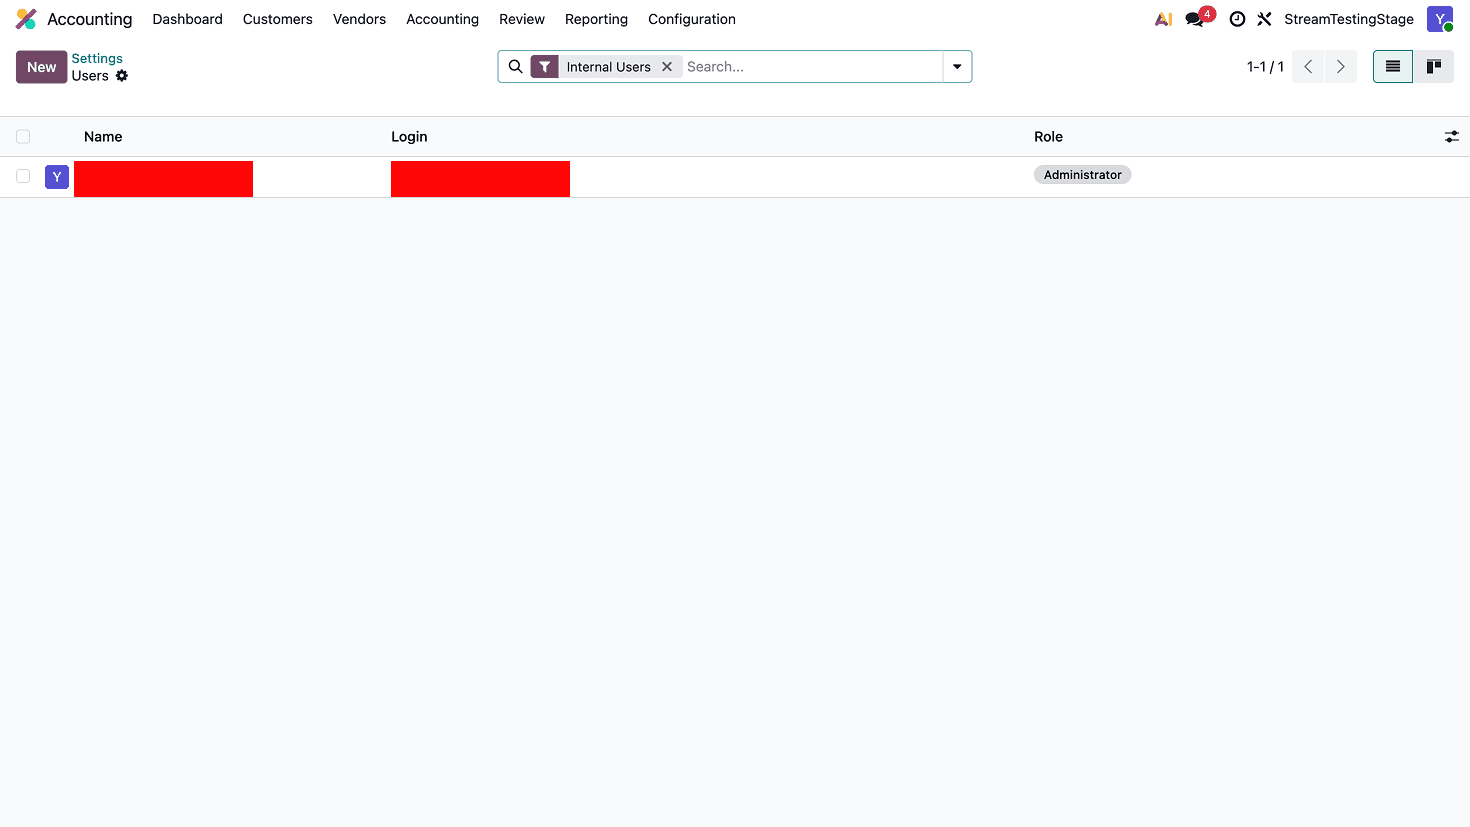
→ go to security → Add API key
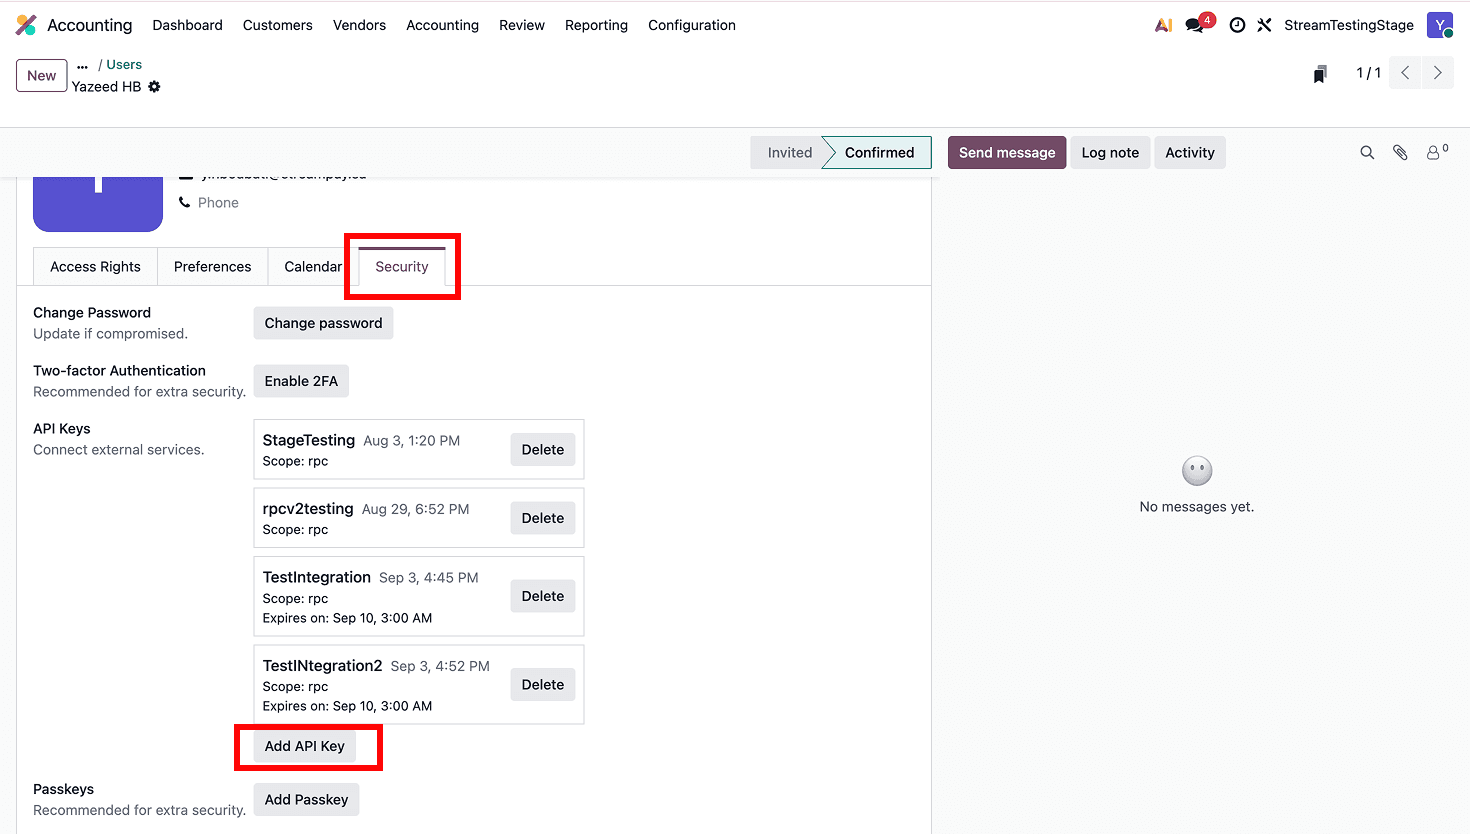
→ finally, paste that key in the "password" field on Stream.
Step 3:
Once you proceed you will choose the company you want to post to:
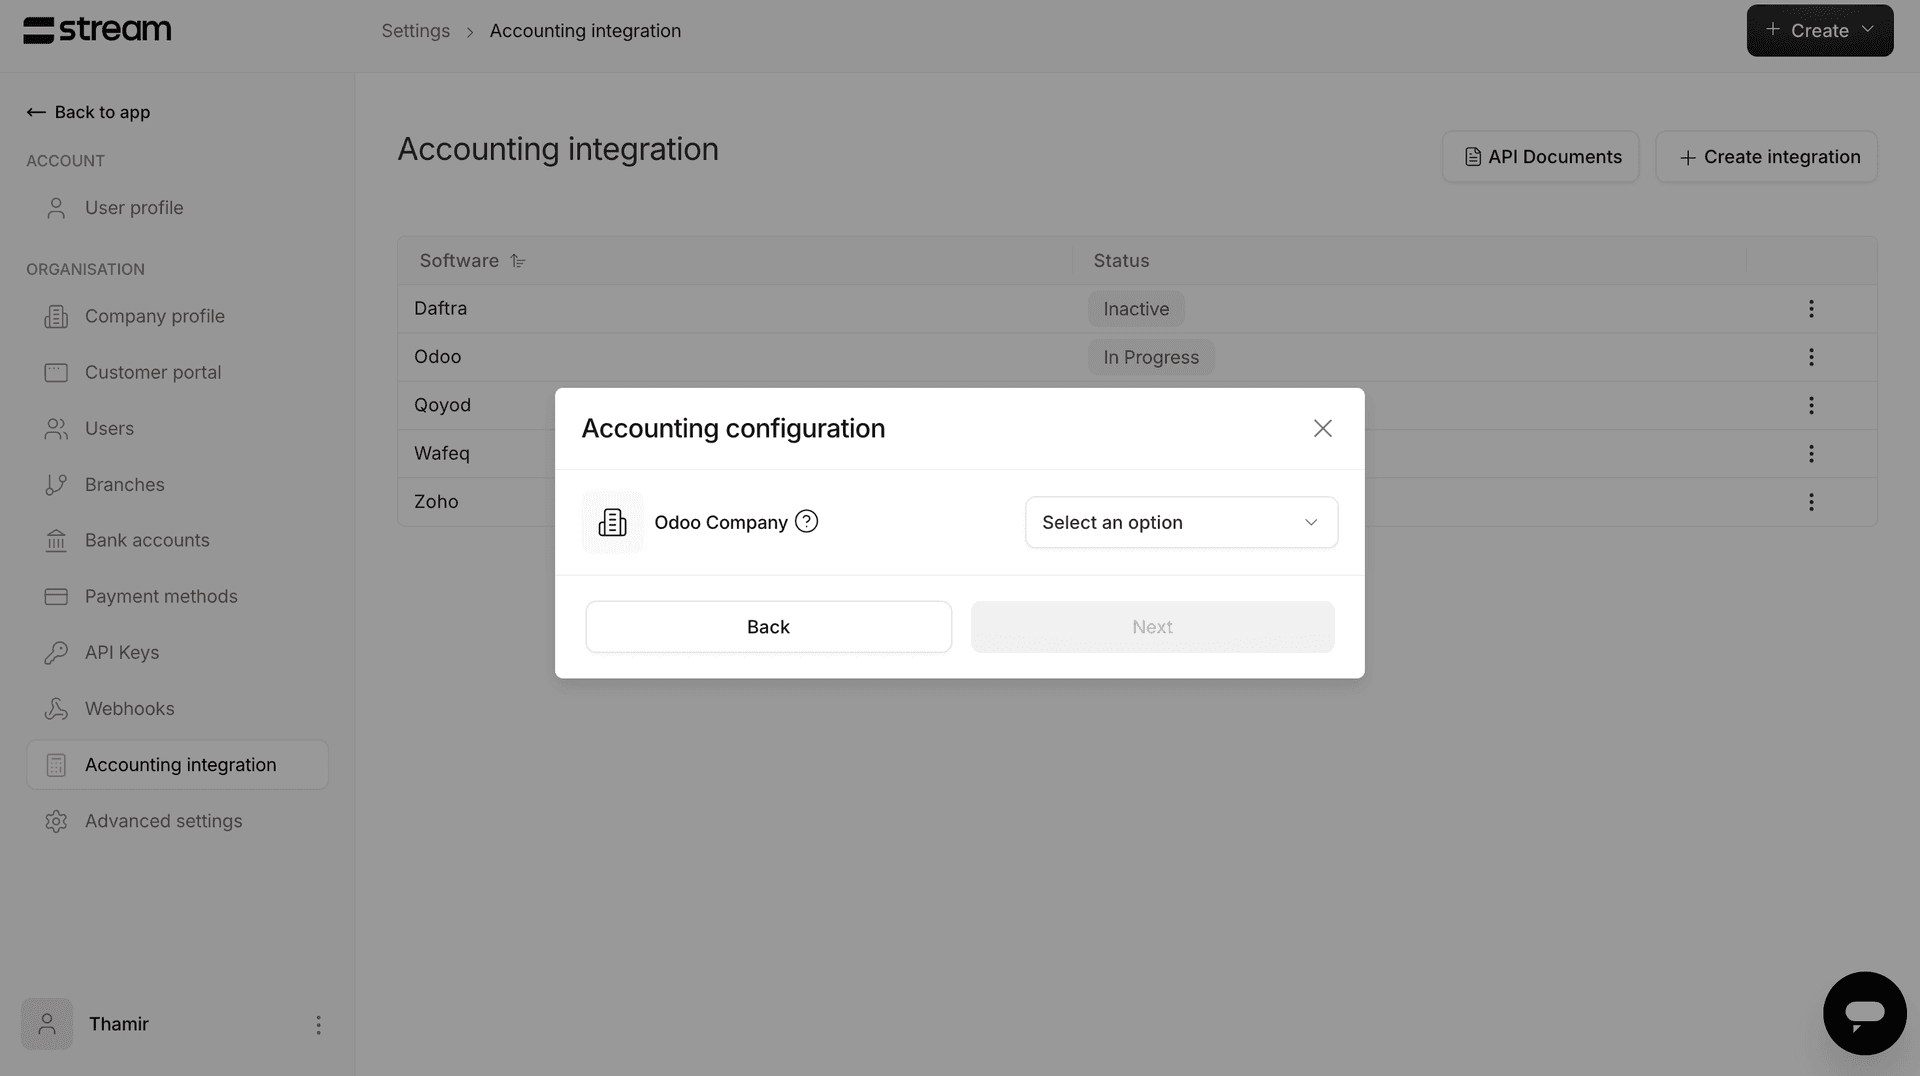
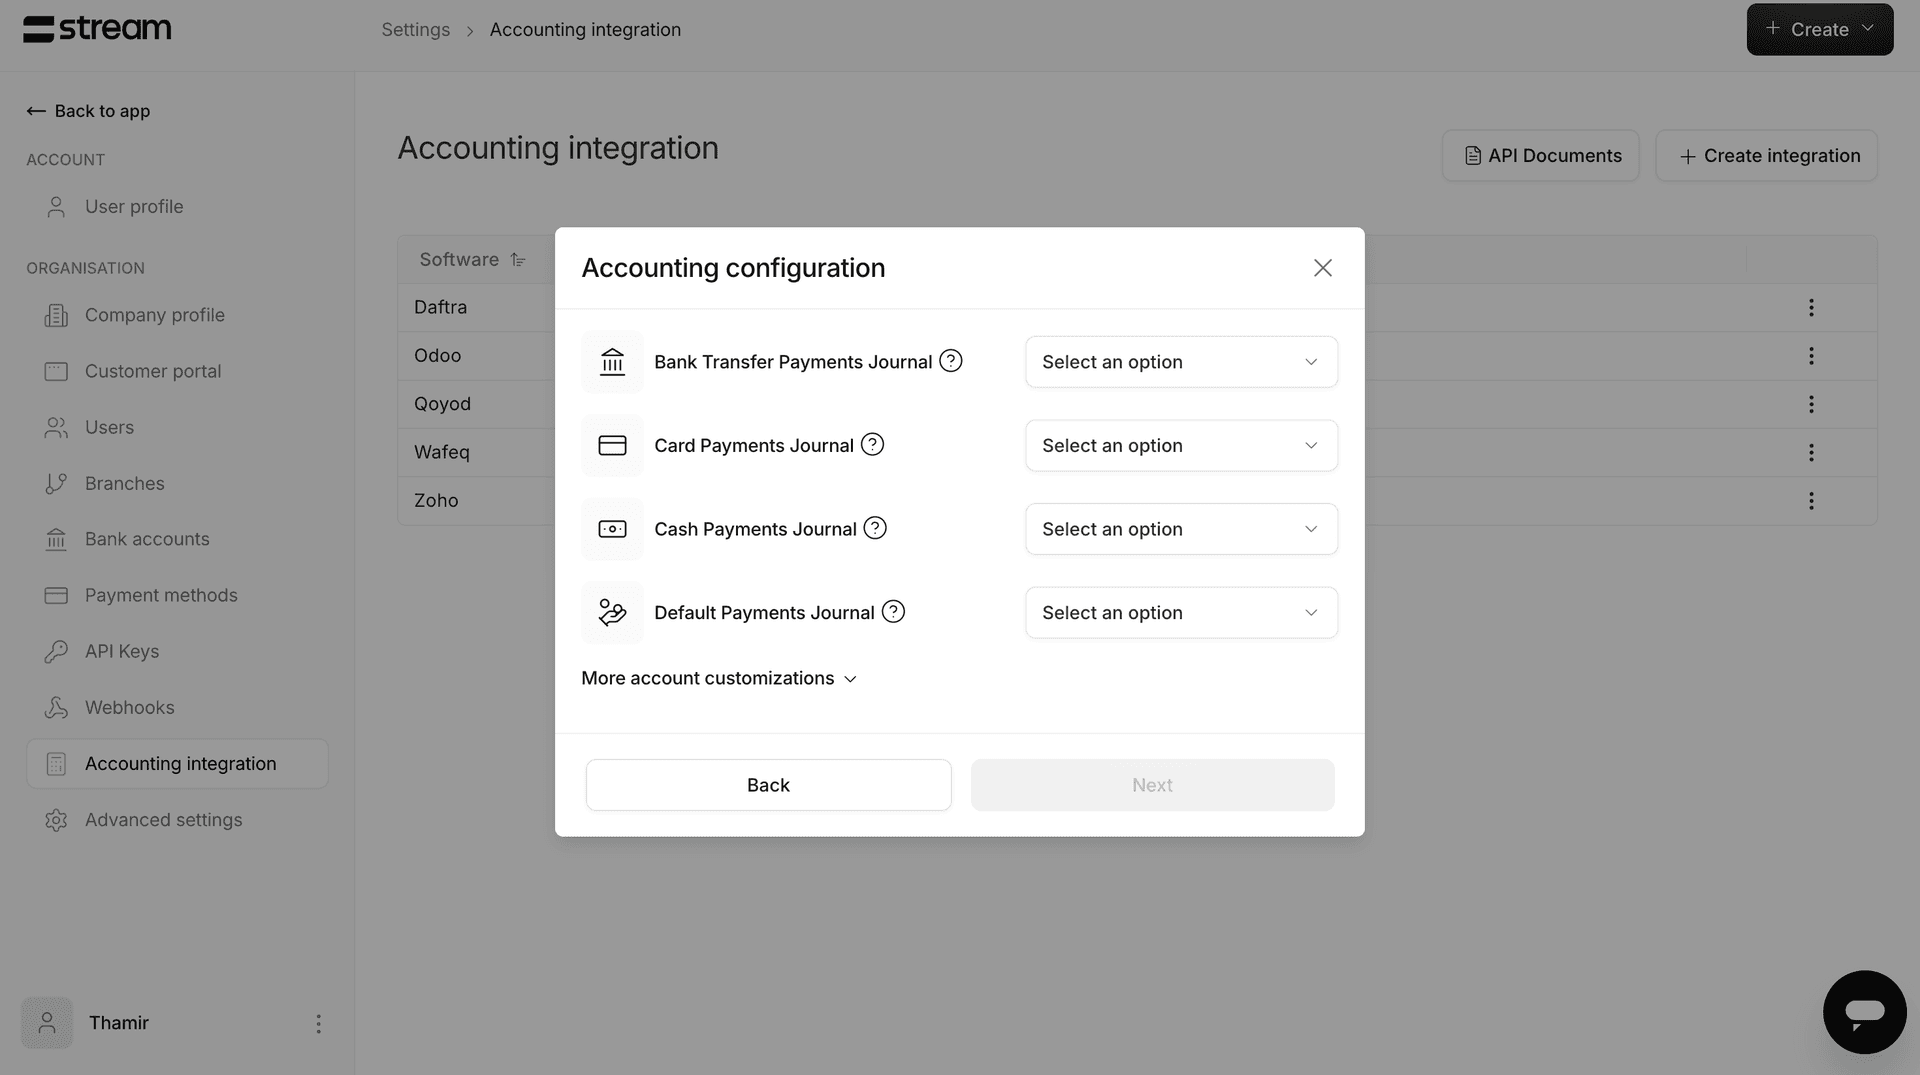
then, when you proceed, you will choose which journal\account the invoices are sent to (you can divide it by each of the payment methods, for easier management if you'd like, by clicking on "more account customizations"):
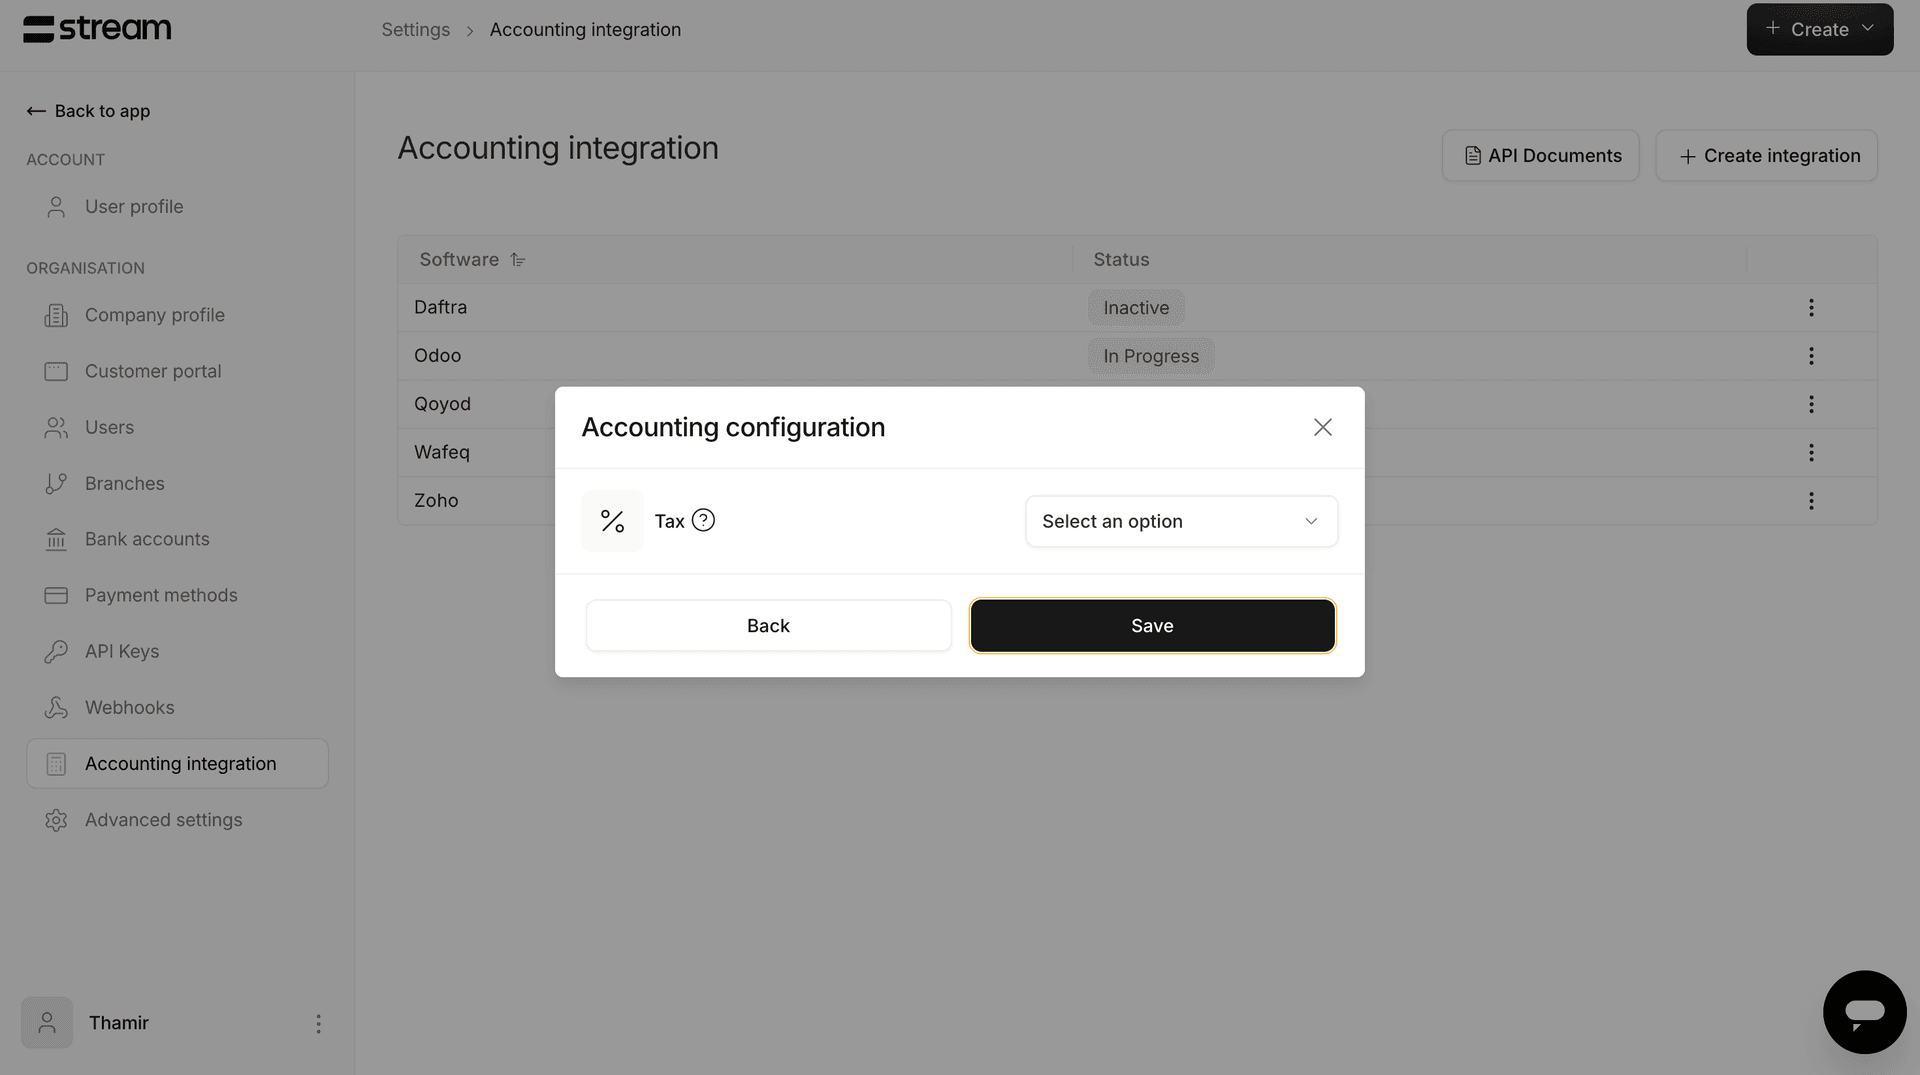
Then finally, you choose your preferred tax rates:
The integration is now done, and your invoices will be received and updated in real-time on Odoo.
Qoyod:
Step 1:
Sign in to your stream dashboard → settings → accounting integration → Create integration
Step 2:
Once you choose when to post your invoices (whether on creation, or after payment), you will be able to choose your software (Qoyod in this case), and then you will see the API key field you will have to fill, as image shows:
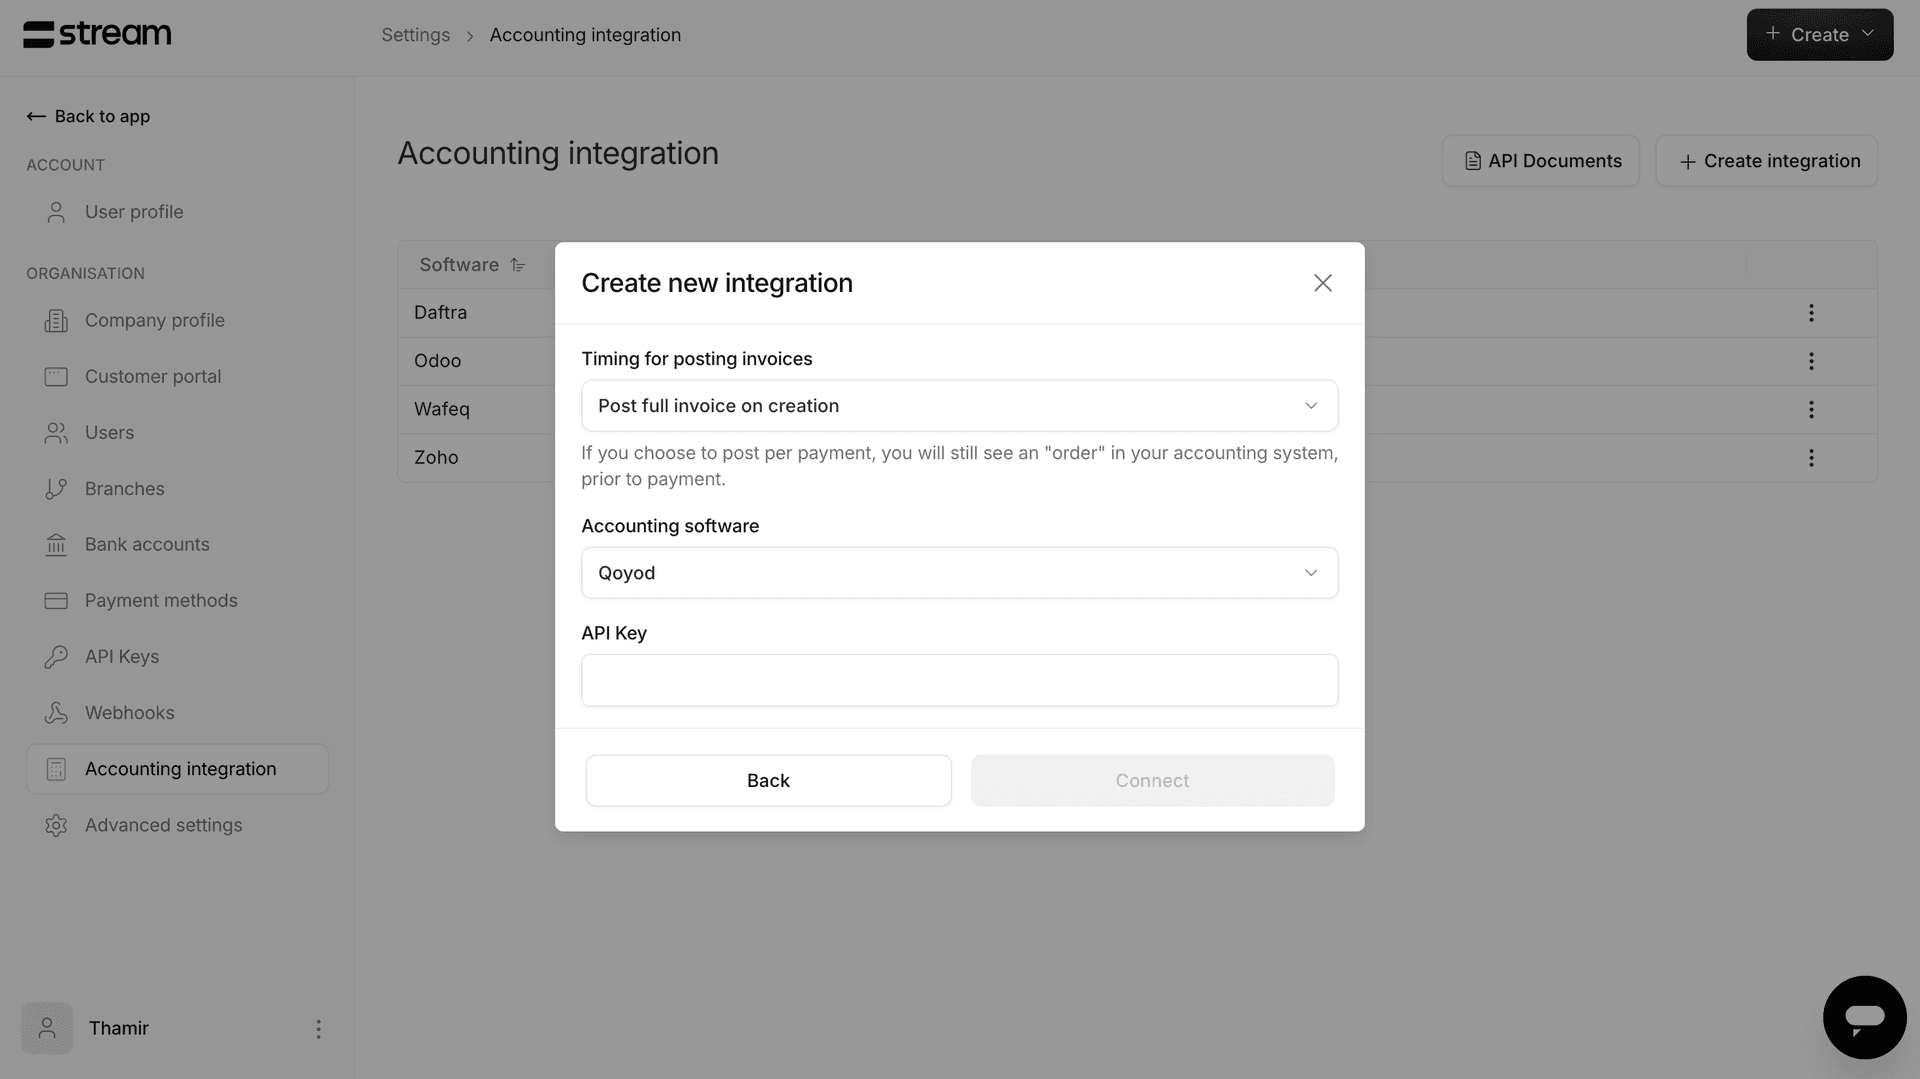
The API key can be generated on Qoyod, by going to settings → General Settings → scroll down and you will see API key (you can generate a new one and copy it into Stream's API key field).
Step 3:
Then, you will proceed to choose which account the invoices are sent to (you can divide it by each of the payment methods, for easier management if you'd like, by clicking on "more account customizations"):
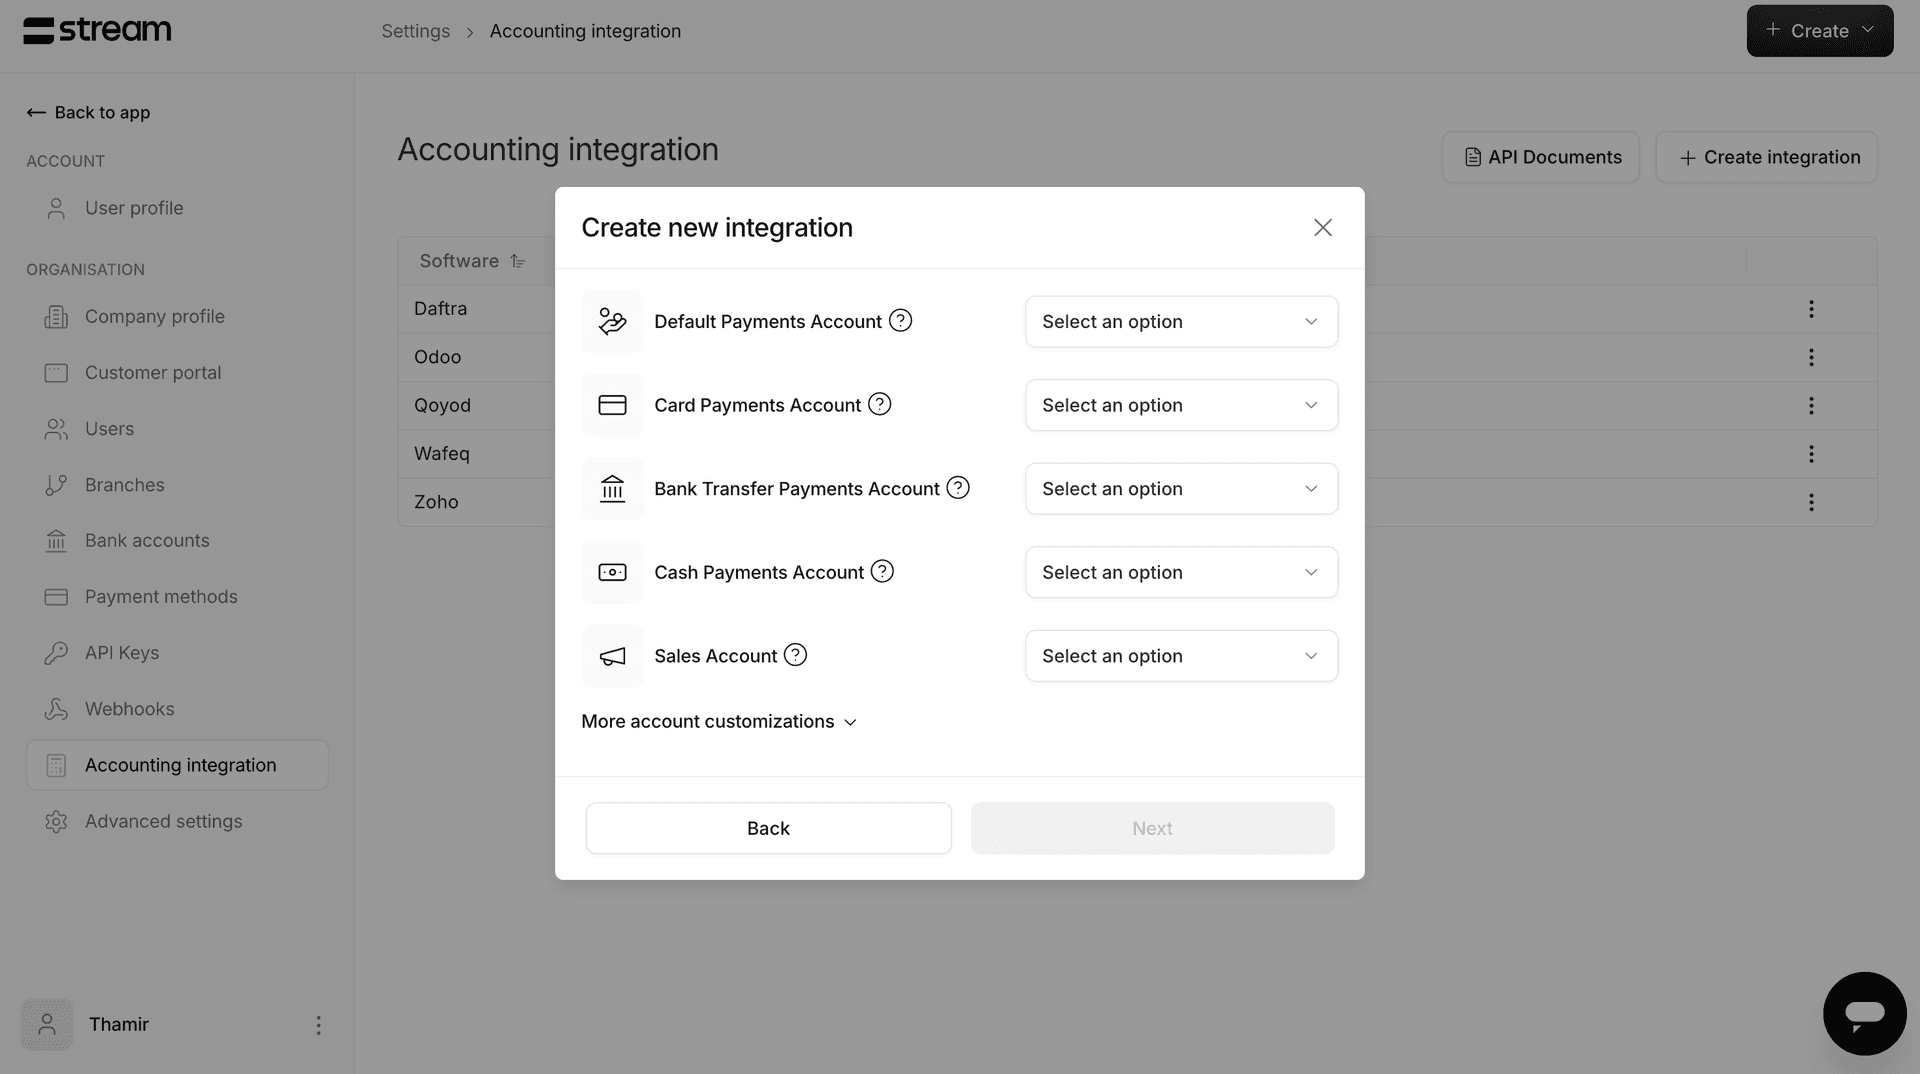
(Note: For sales account - fifth field in image: Make sure you choose the: "Revenue of products and services sales", for the integration to work smoothly).
Finally you will reach the products specification steps to fill out some information regarding taxes and products:
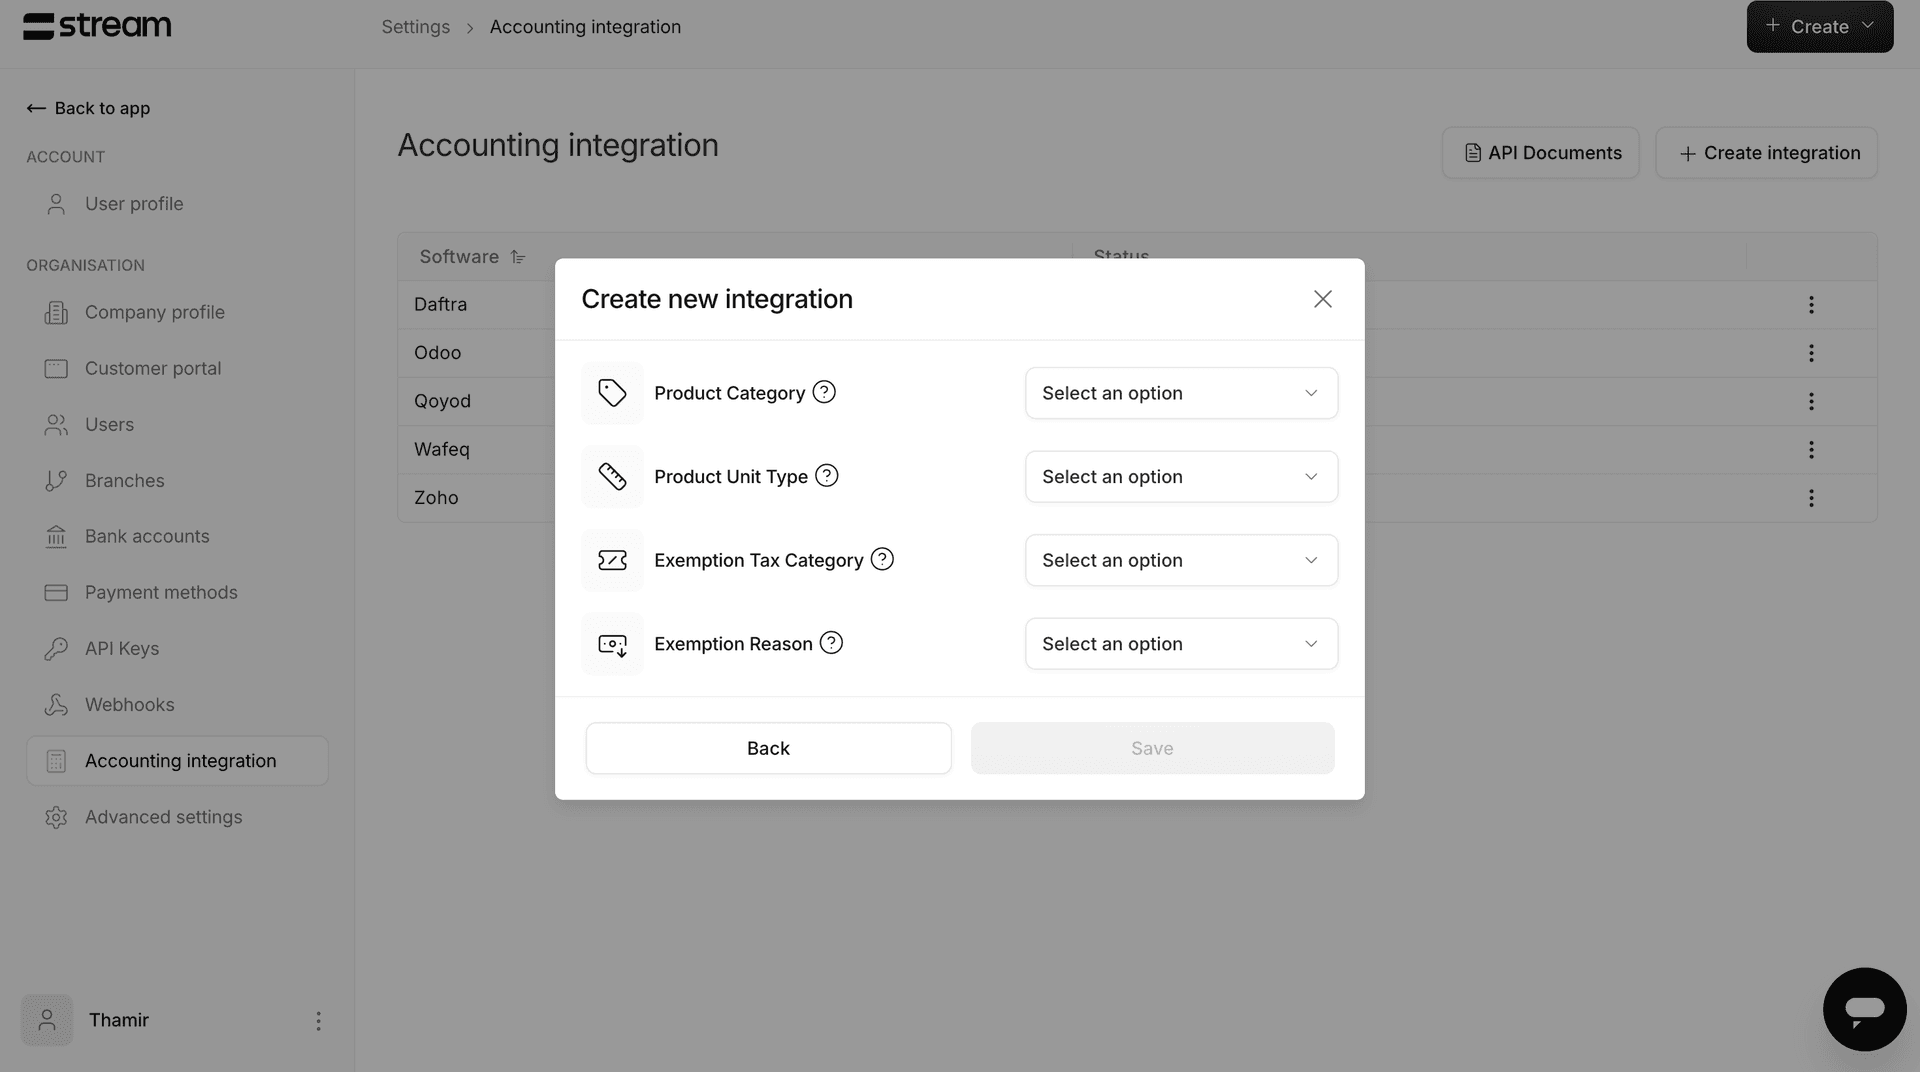
The integration is now done, and your invoices will be received and updated in real-time on Qoyod.
Zoho:
Step 1:
Sign in to your stream dashboard → settings → accounting integration → Create integration
Step 2:
Once you choose when to post your invoices (whether on creation, or after each payment), you will be able to choose your software (Zoho in this case), and then you will be redirected to sign in to your Zoho account to authorize stream:
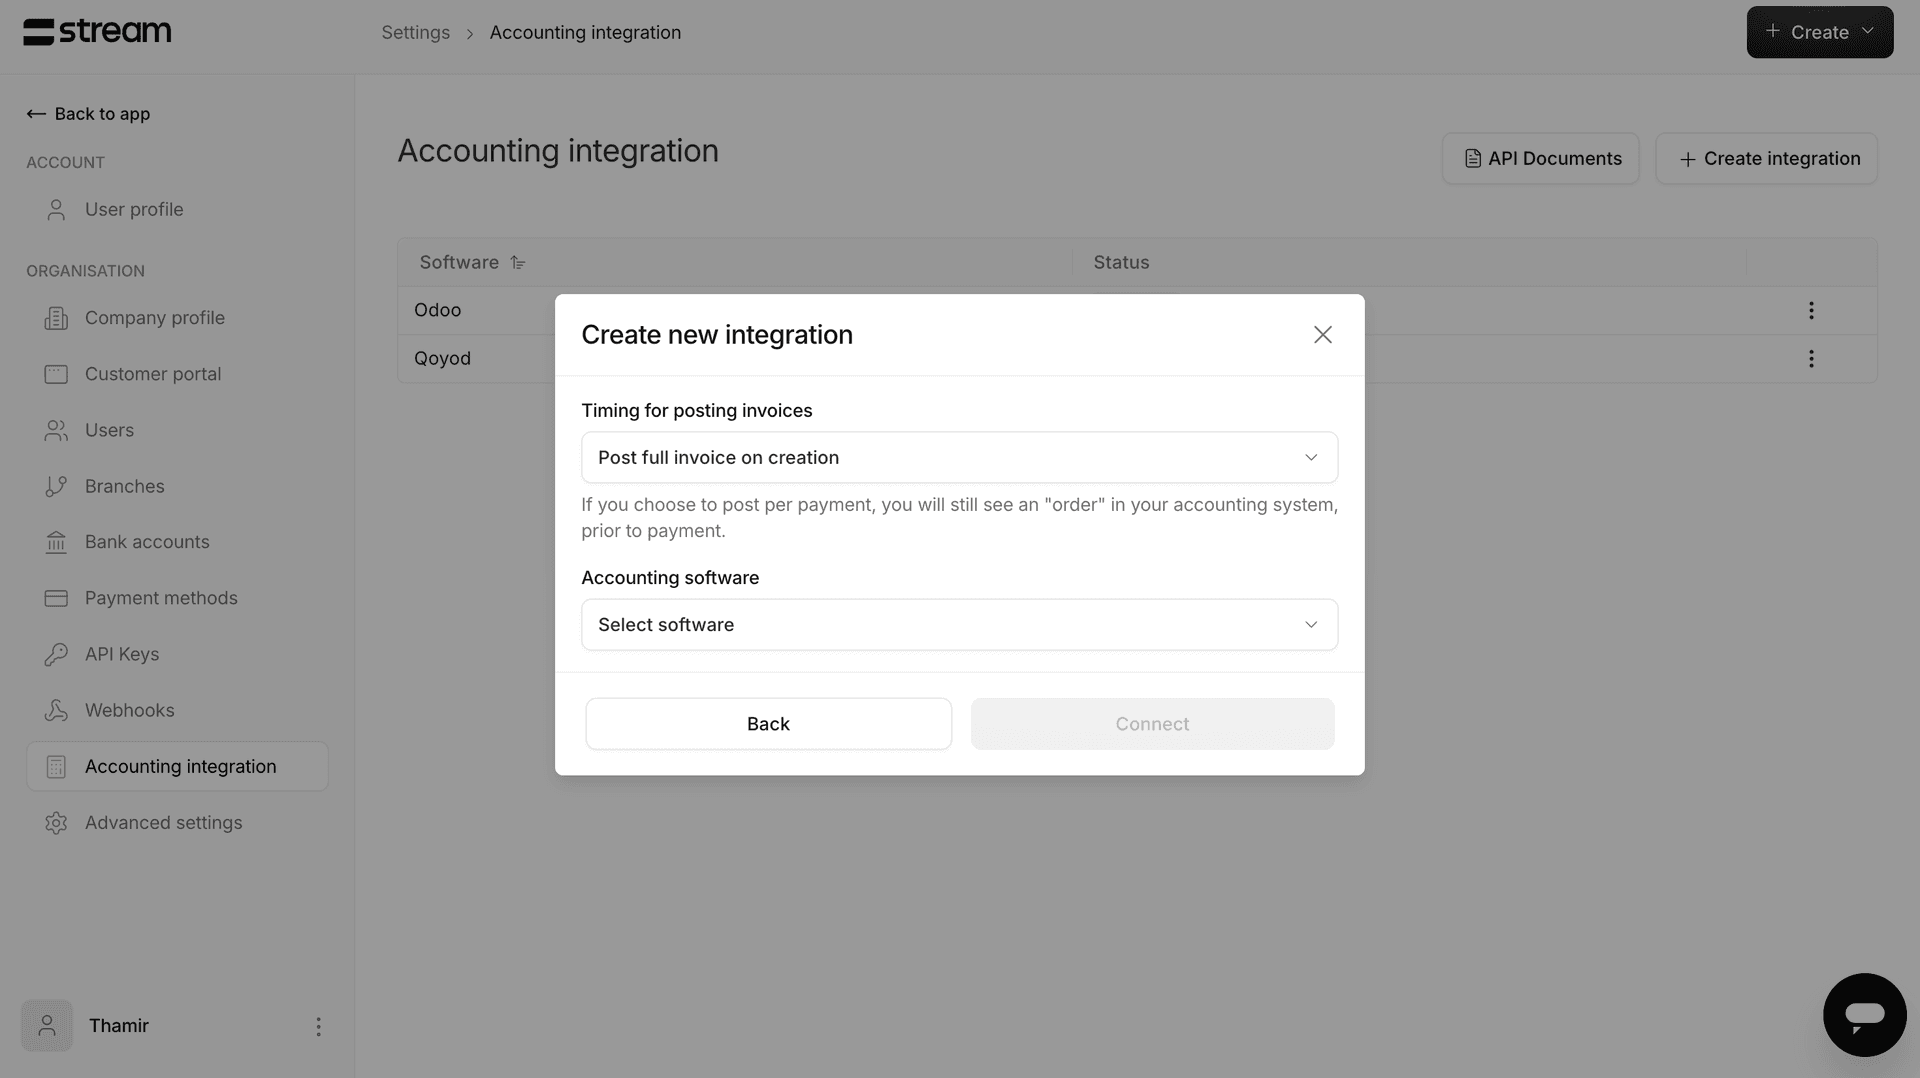
Step 3:
Once you sign in, you will be redirected back to stream to choose your organization:
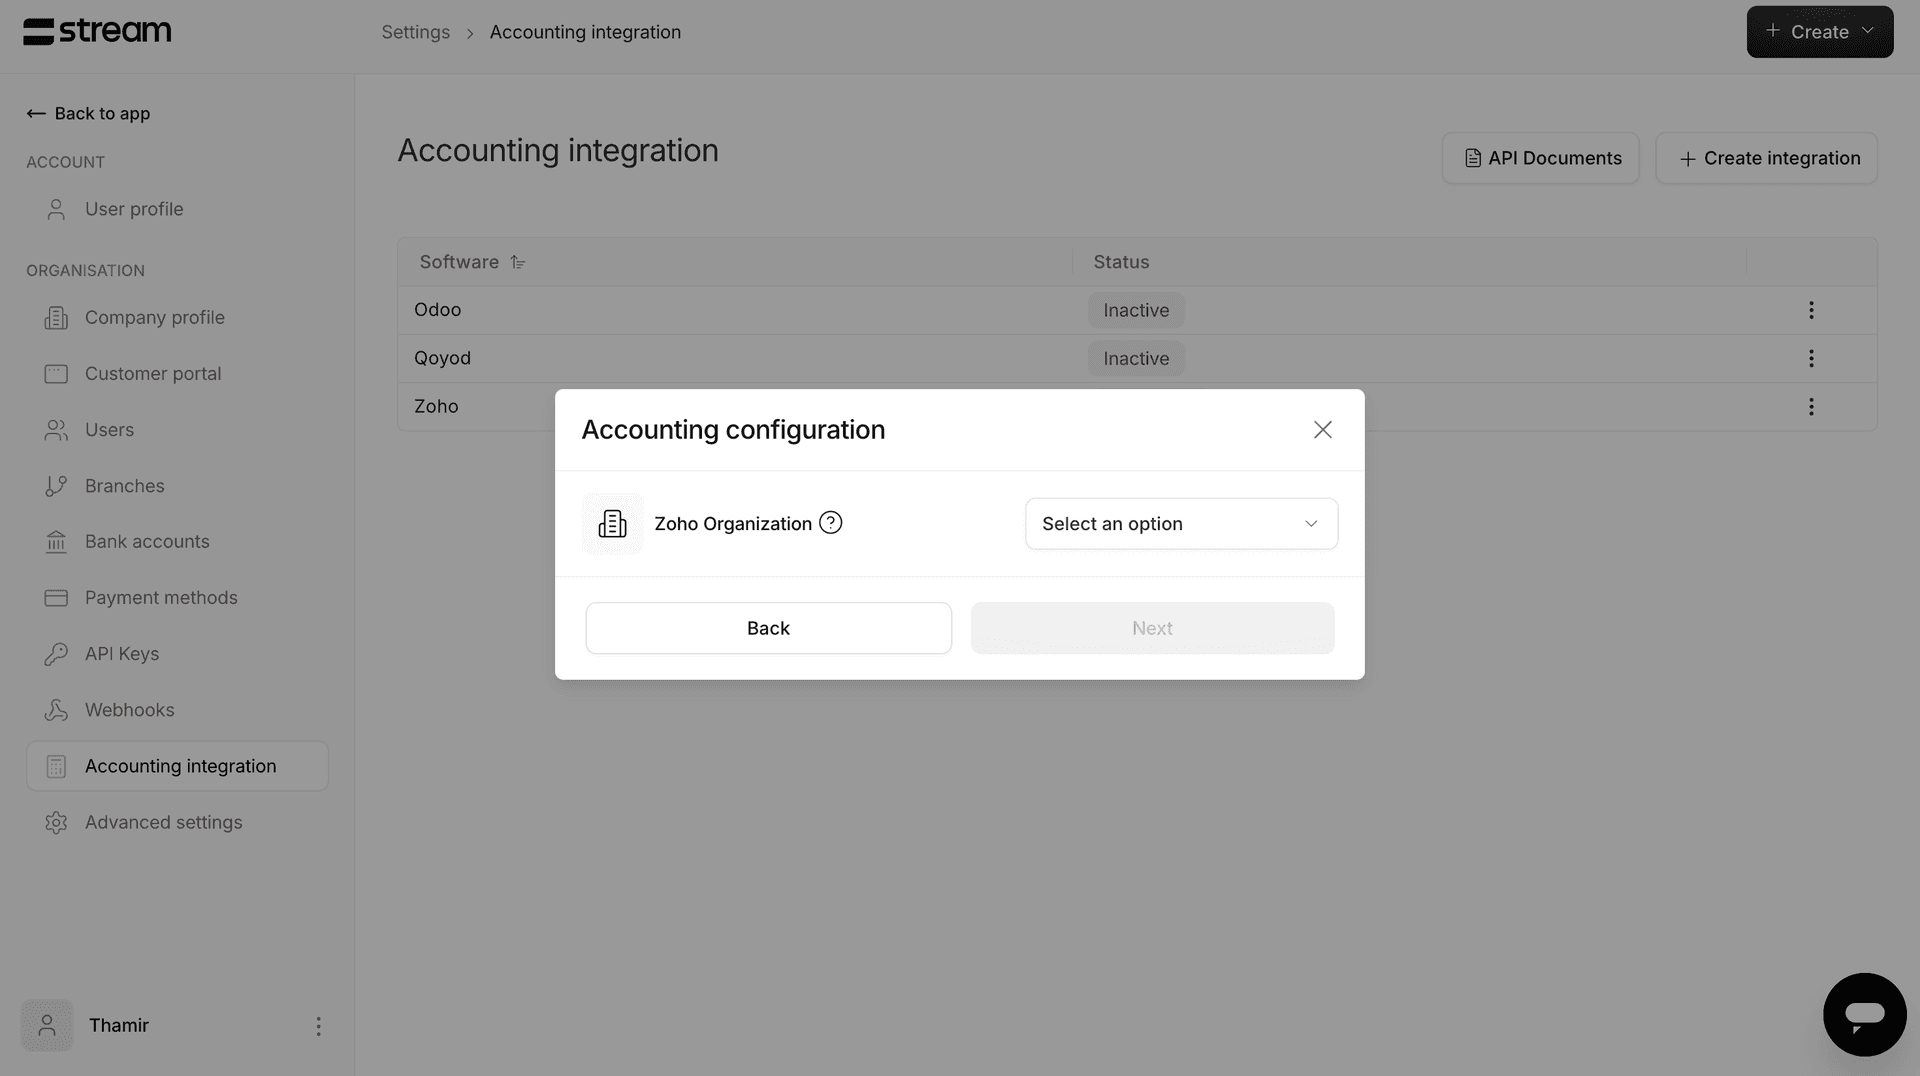
then, once you proceed, you will choose which account the invoices are sent to (you can divide it by each of the payment methods, for easier management if you'd like, by clicking on "more account customizations"):
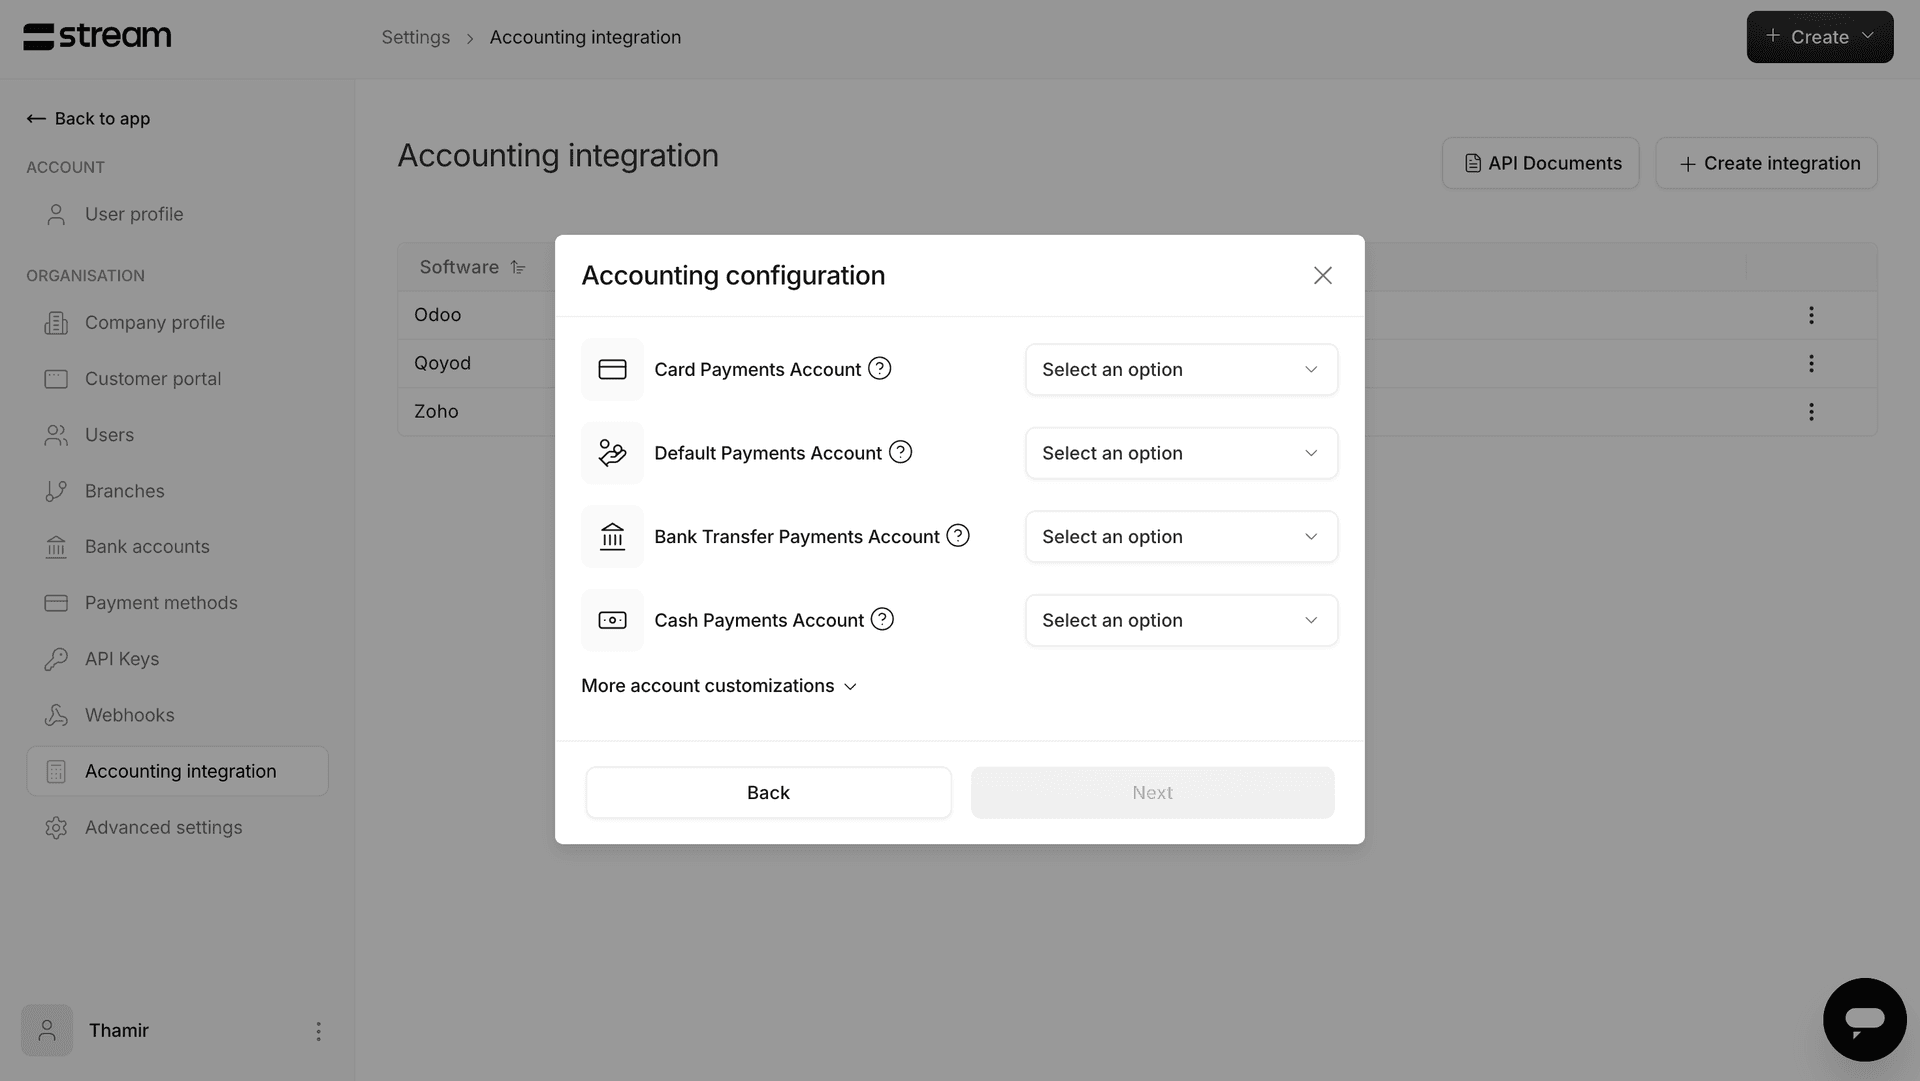
The integration is now done, and your invoices will be received and updated in real-time on Zoho.
Daftra:
Step 1:
Sign in to your stream dashboard → settings → accounting integration → Create integration
Step 2:
Once you choose when to post your invoices (whether on creation, or after each payment), you will be able to choose your software (Daftra in this case), and then you will be asked to add two fields:
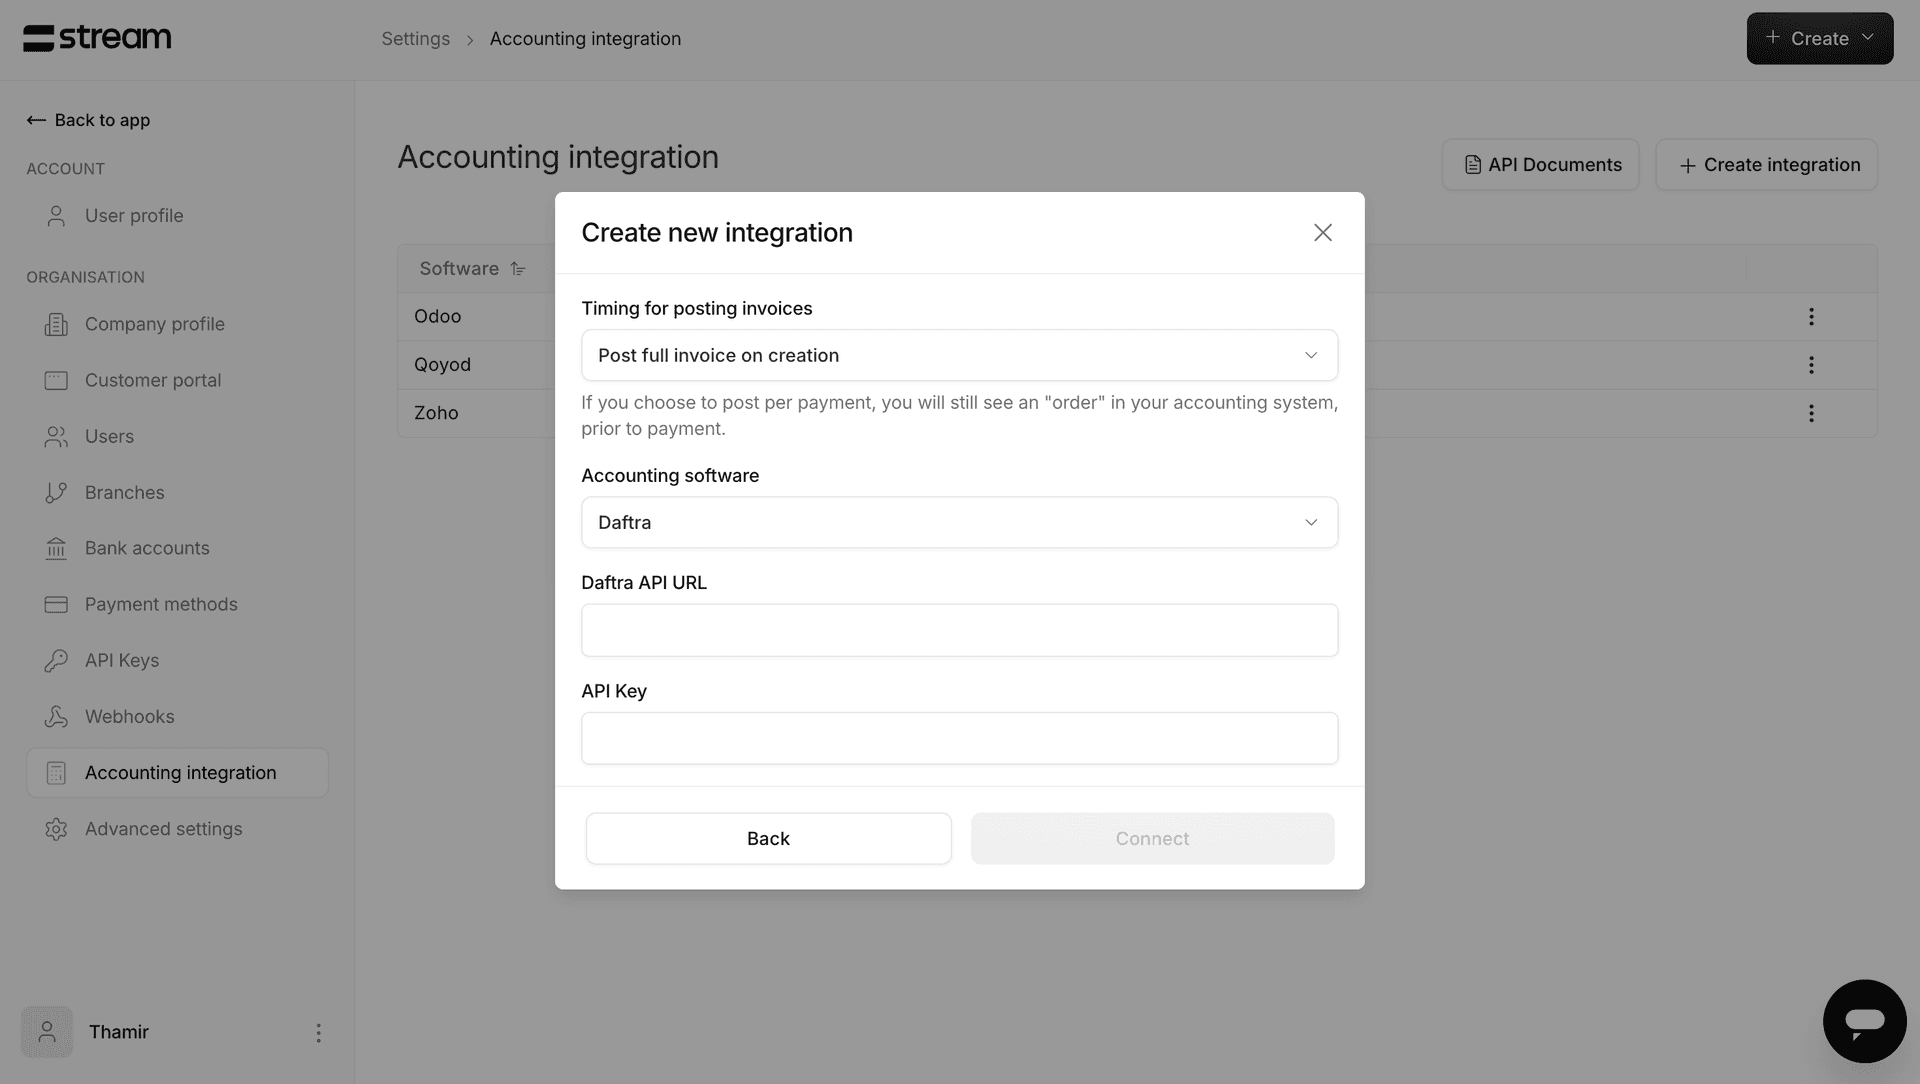
The API URL:
which consists of your daftra URL: https://{subdomain}.daftra.com/ (Example: thamir299.daftra.com/)
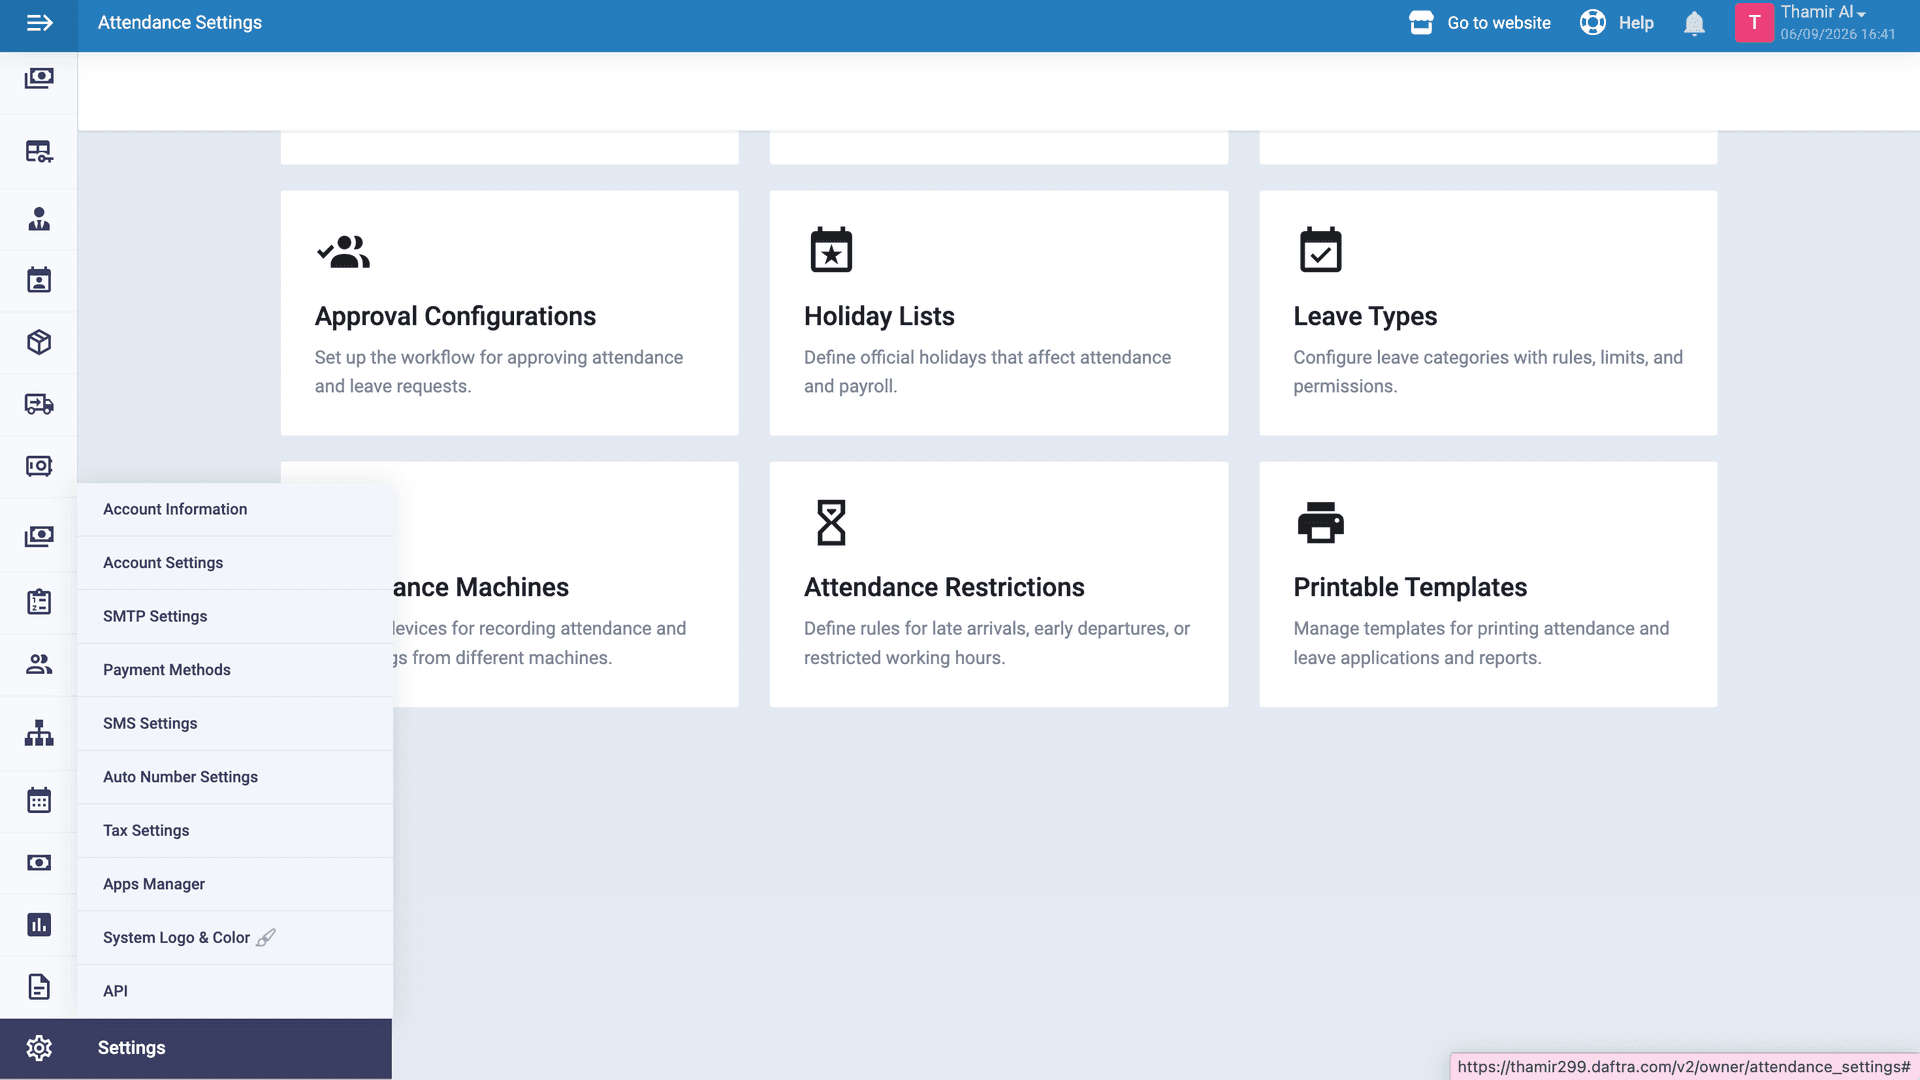
The API key:
You can find it by going to the settings icon on daftra, and clicking API → API keys → Generate new key → paste on Stream
Step 3:
Once you proceed, you will choose your tax configurations:
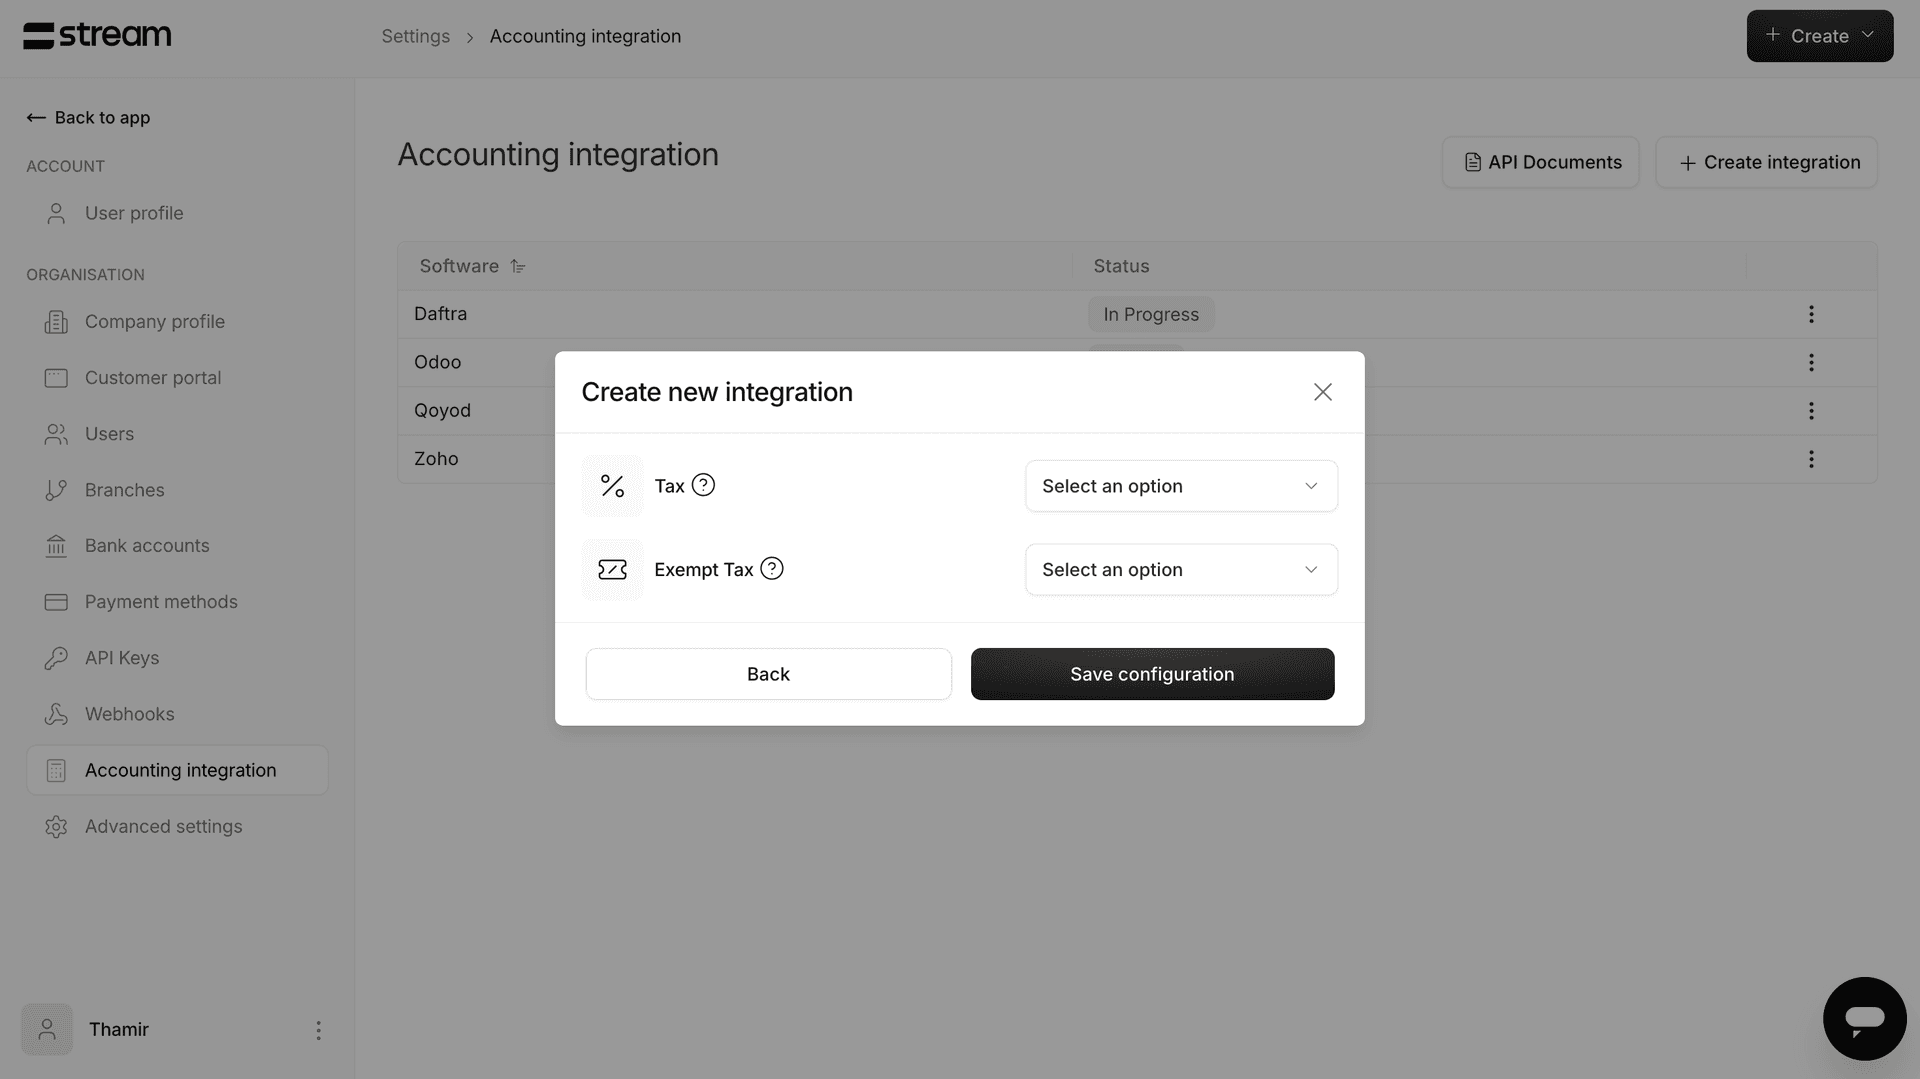
The integration is now done, and your invoices will be received and updated in real-time on Zoho.
Wafeq
Step 1:
Sign in to your stream dashboard → settings → accounting integration → Create integration
Step 2:
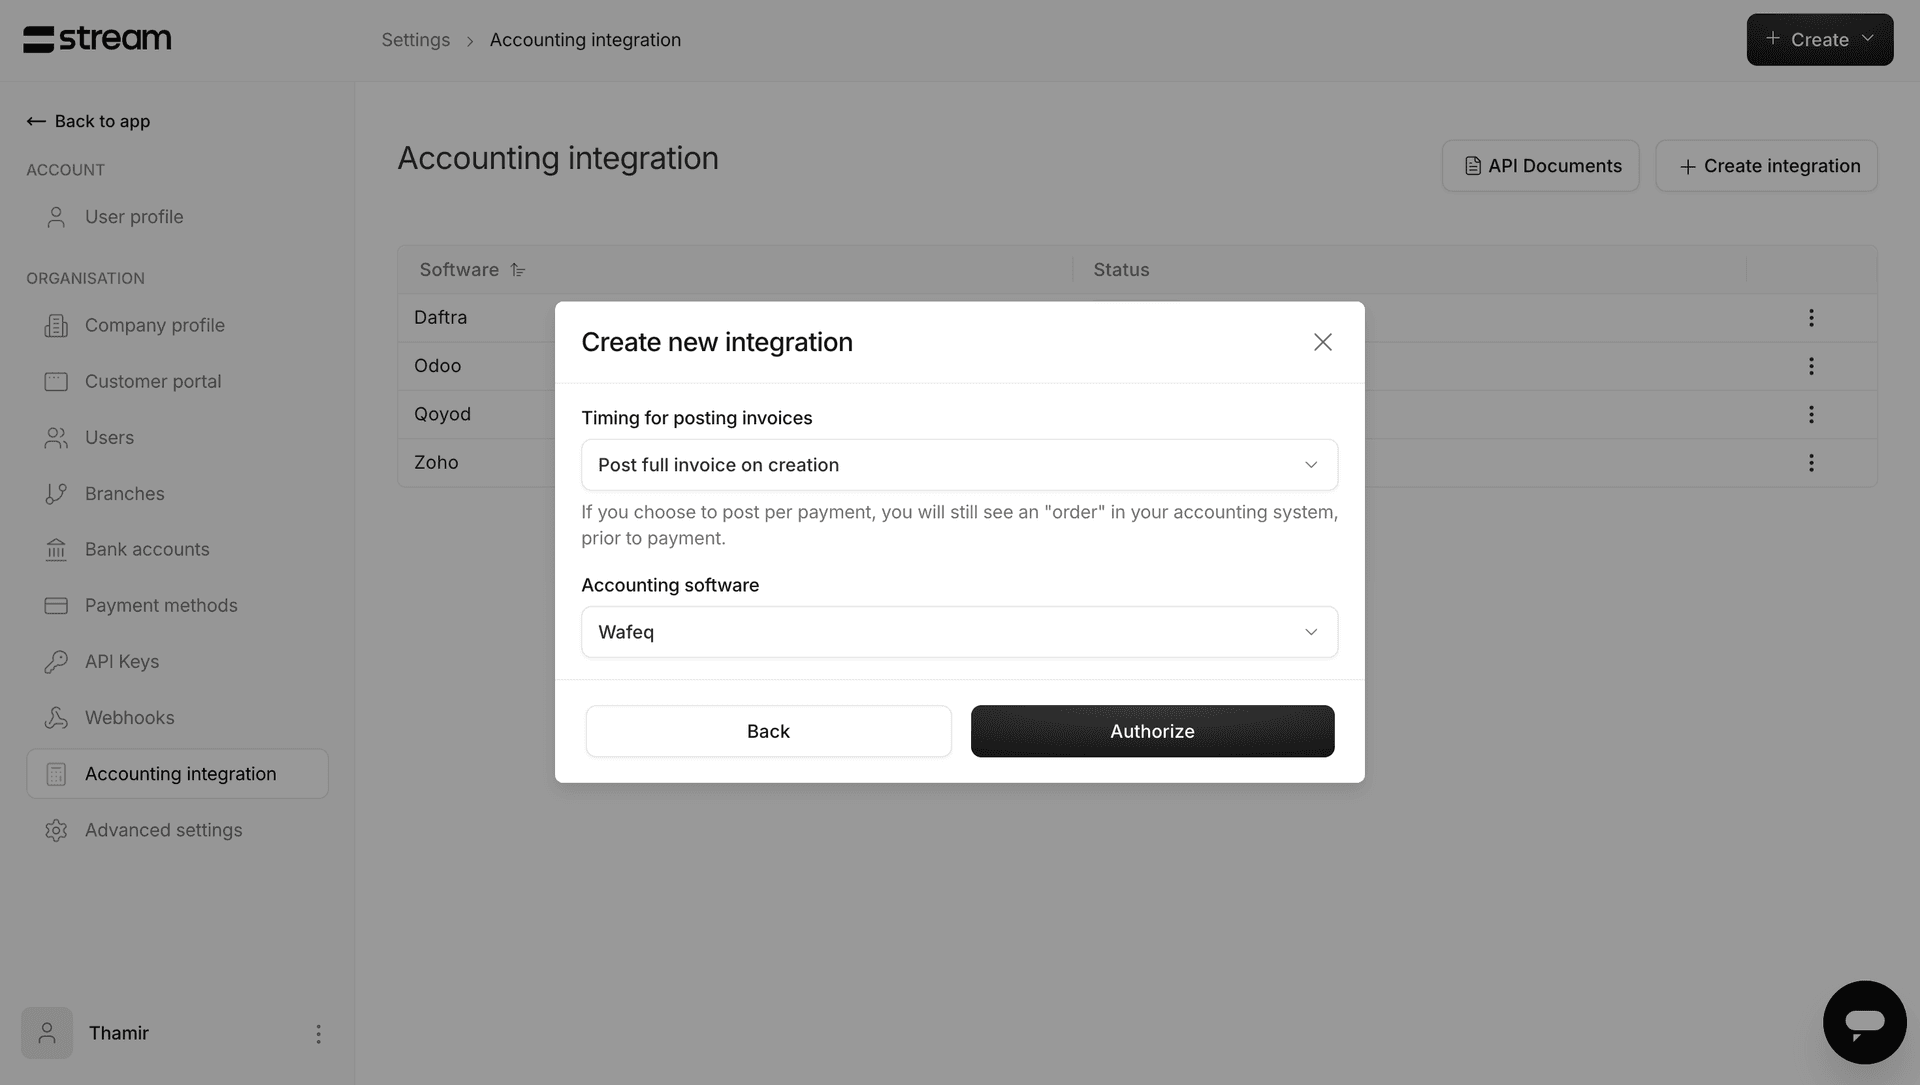
Once you choose when to post your invoices (whether on creation, or after each payment), you will be able to choose your software (Wafeq in this case), and then you will be redirected to sign in to your Wafeq account to authorize stream:
Step 3:
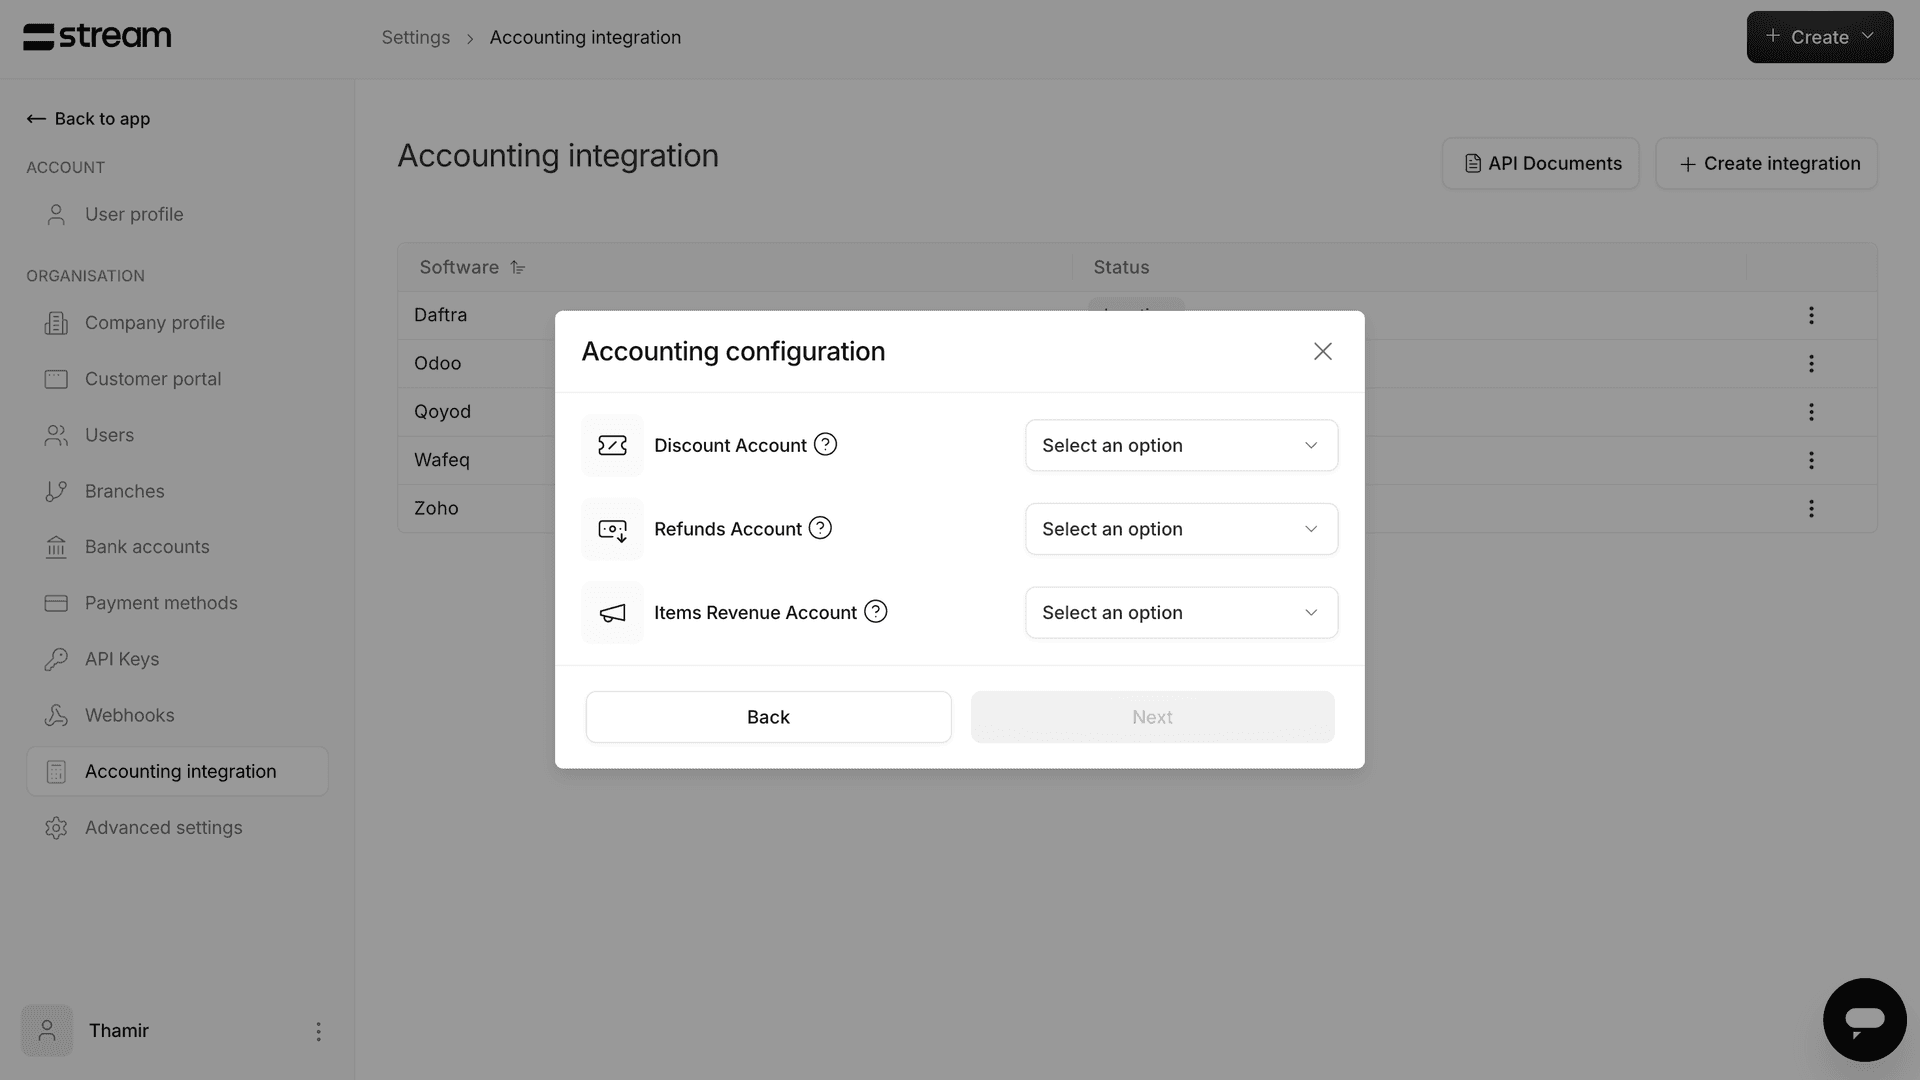
Once you proceed, you will choose your primary account configurations:
Step 4:
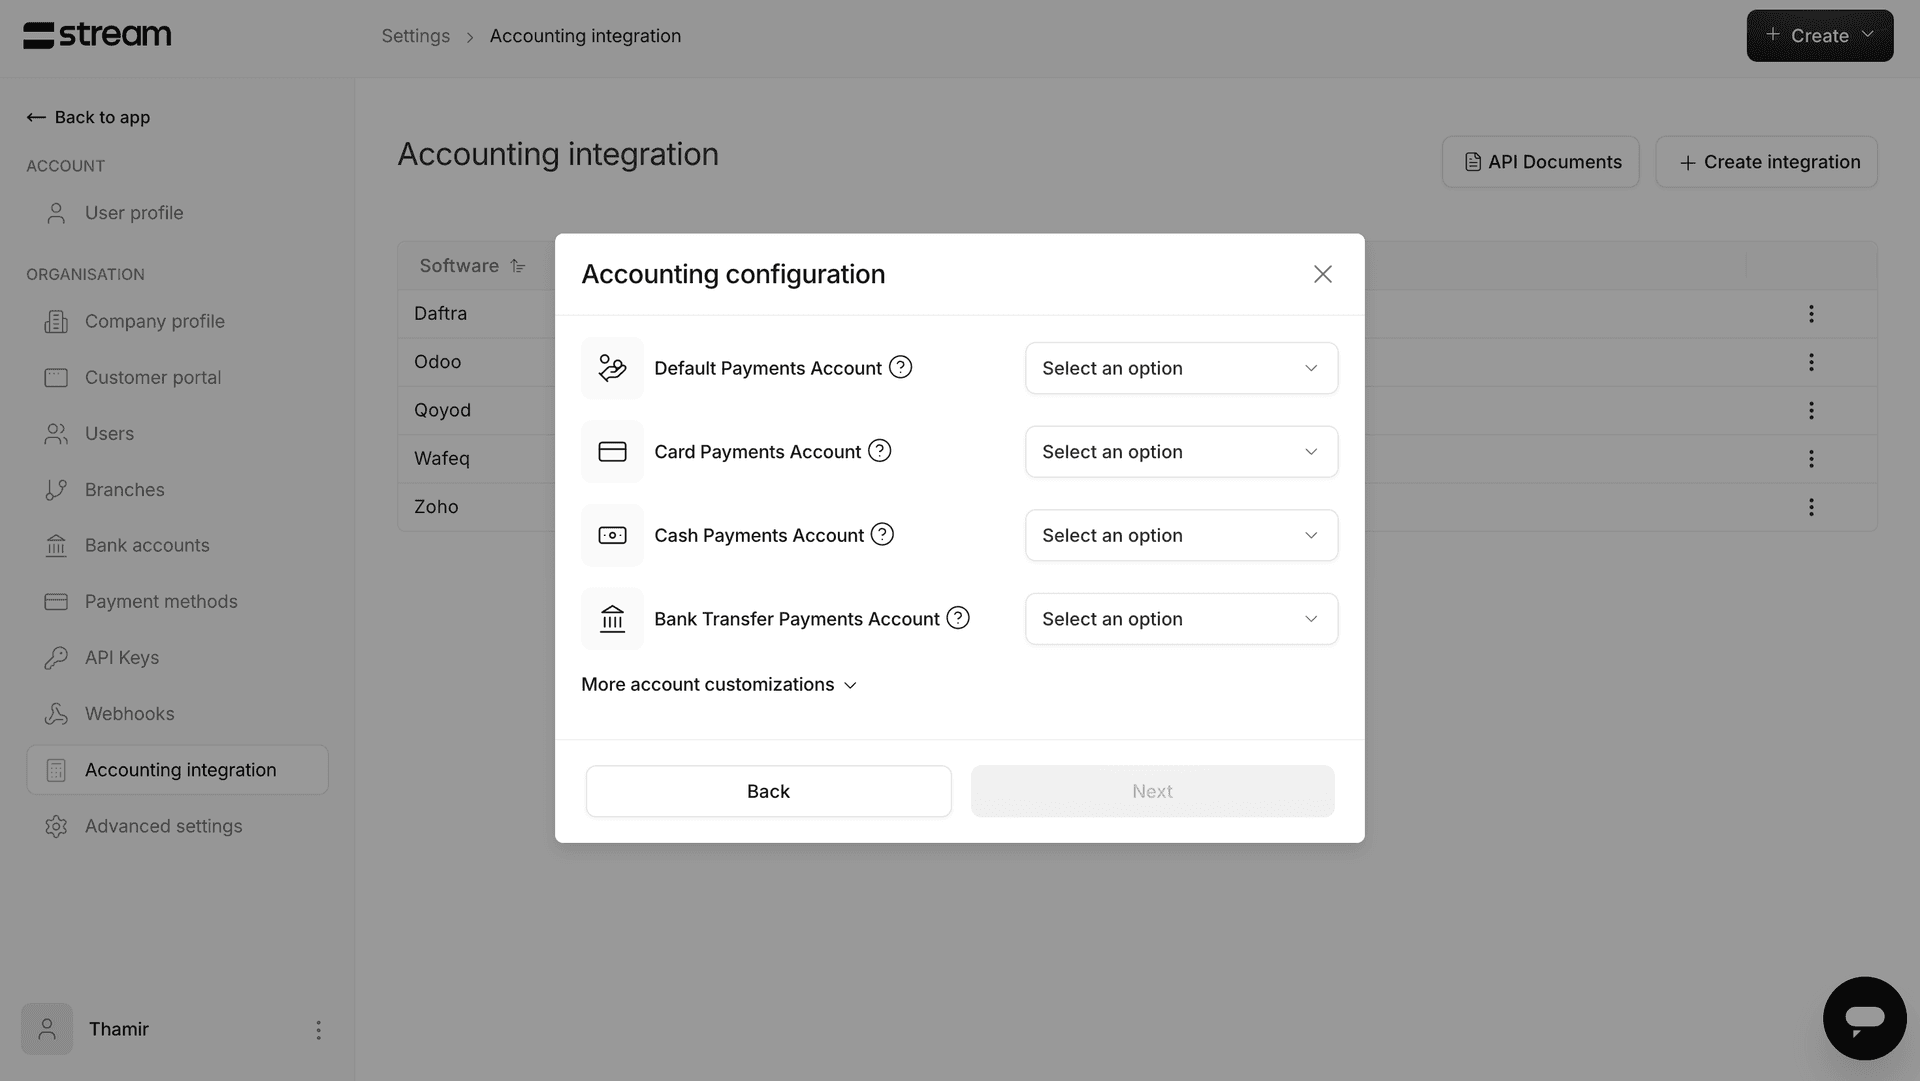
once you proceed, you will choose which accounts the invoices are sent to (you can divide it by each of the payment methods, for easier management if you'd like, by clicking on "more account customizations"):
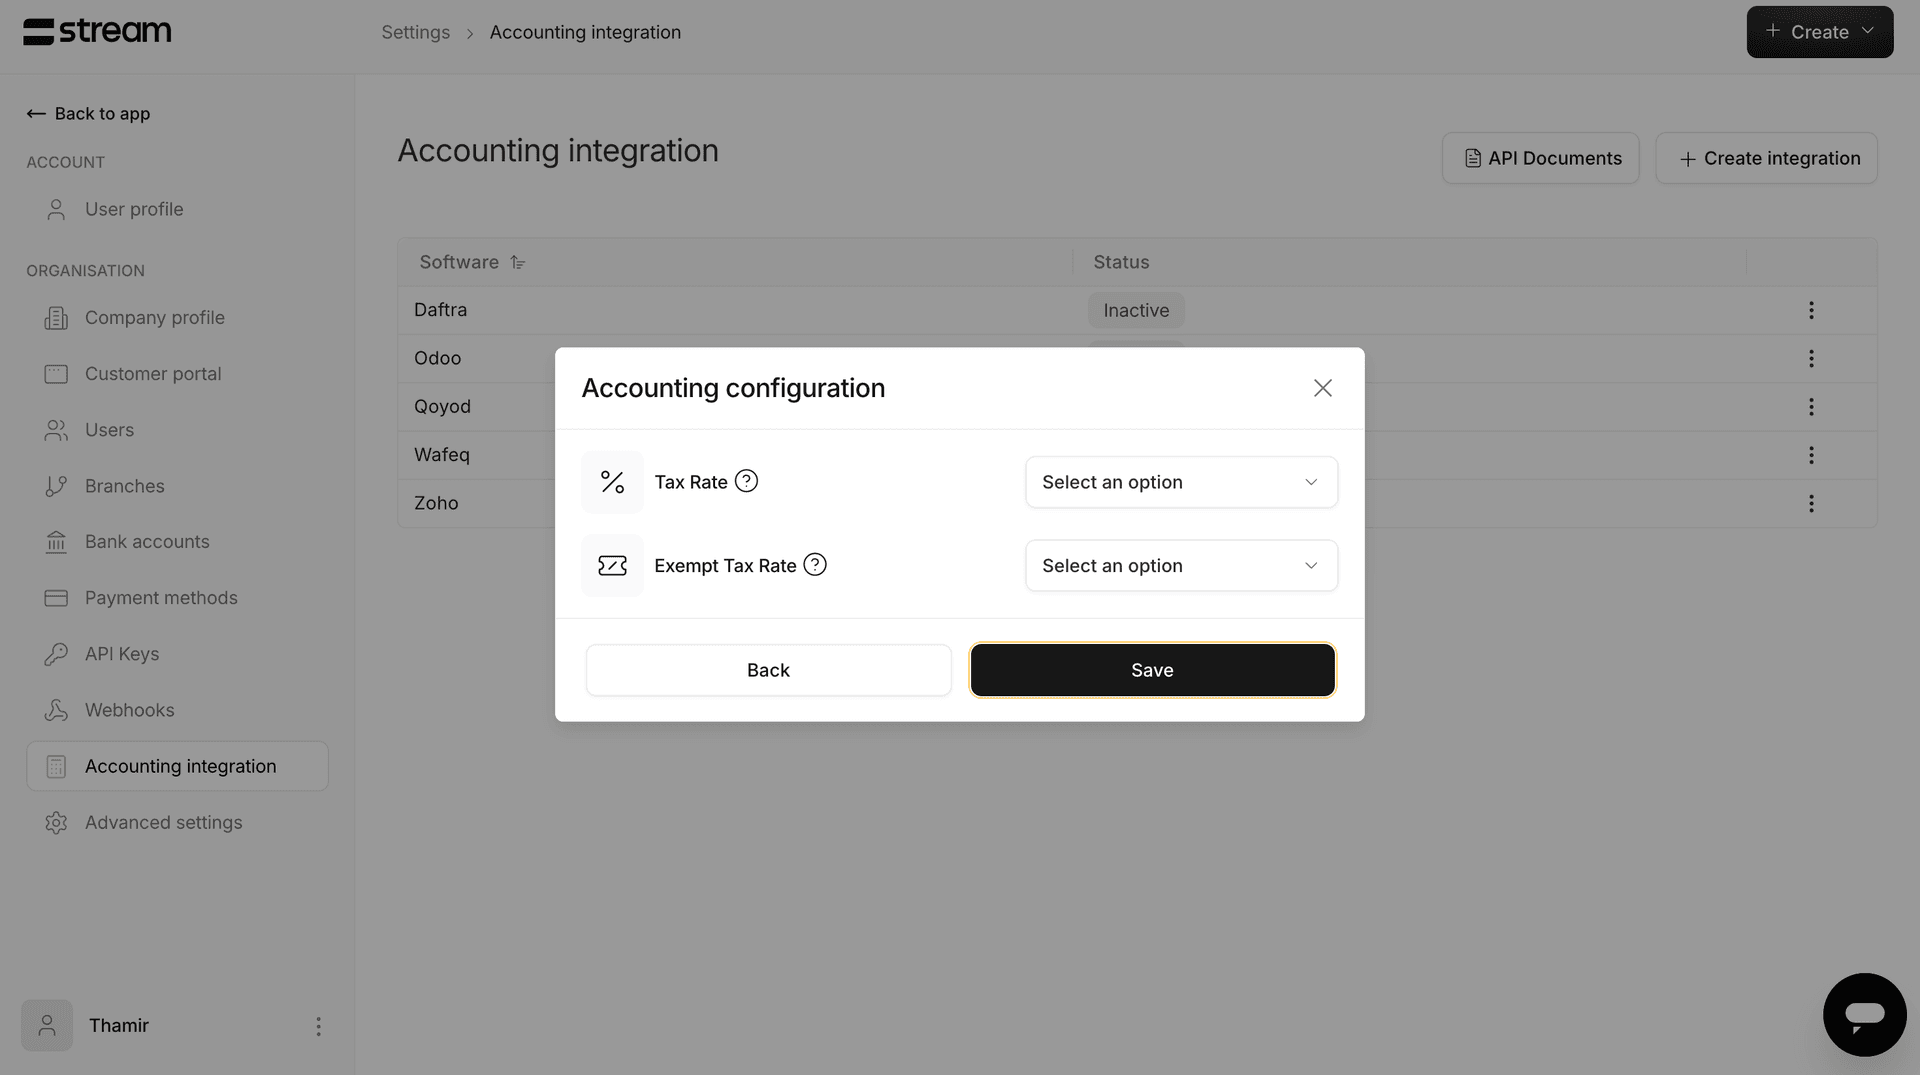
Then finally, your tax configurations:
The integration is now done, and your invoices will be received and updated in real-time on Wafeq.